Steps To Recondition An Engine Rebuilding

How to break in a rebuilt engine

The two most commonly used methods to break in a rebuilt engine are dynamometer or load bank testing. However, these methods of engine testing aren’t always possible. If a rebuilt engine isn’t broken in correctly issues can arise including high oil consumption, excessive smoking and overall poor engine performance. This blog article looks at how to break in a rebuilt engine without the use of a dynamometer or load bank…

Why should you break in a rebuilt engine?

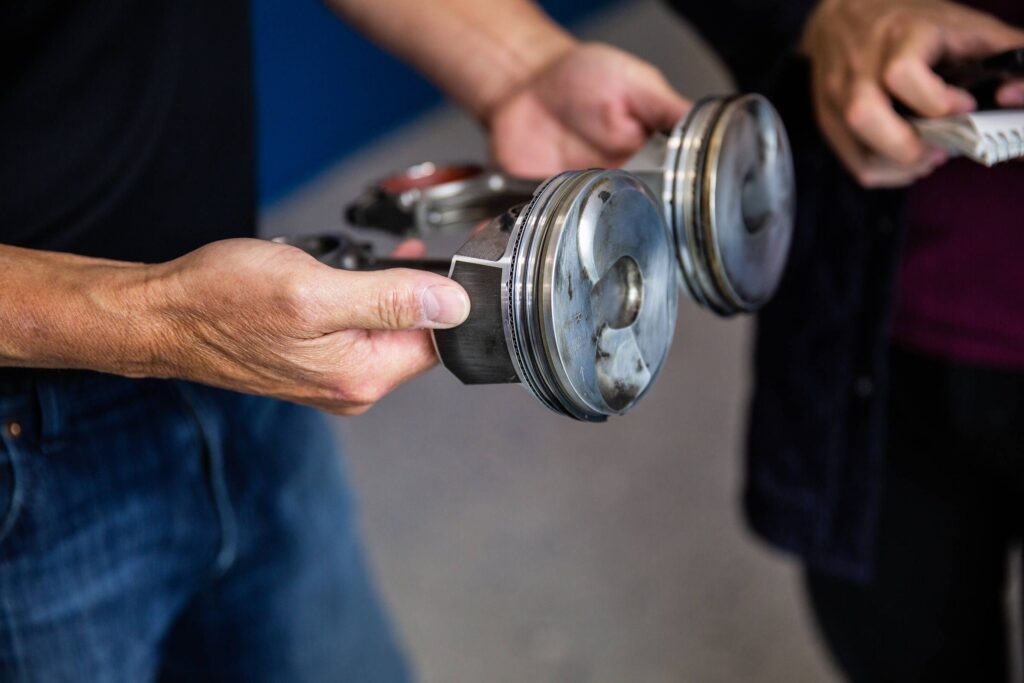
The process of breaking in an engine involves forcing rings and cylinder bores to conform to each other, sealing the combustion gasses within the cylinders. Unfortunately, idling the engine for a period of time will not create the pressures needed. Without serious force, piston rings may not seal properly – resulting in poor oil control and diminished engine performance overall.

Dangers of not breaking in a rebuilt engine

Improper or inadequate breaking in of rebuilt engines causes what is known as ‘glazing’, which prevents piston rings from ever sealing correctly. Glazing refers to how hard oil and fuel deposits collect on the cylinder walls of an engine. Once this happens, the only way to rectify the issue is to dismantle the entire engine again and break it in correctly.

Just rebuilt an engine? Here’s how to break it in:

Apply Make-Shift Loads

Most engine rebuilders agree that to correctly seal the piston rings, you need to focus on getting around 75% of full load on the rebuilt engine for a few hours – keeping idle time to a minimum. Ways of breaking in vehicular engines include:

  • Attach a heavy trailer, find a long steep hill, and drive up it once or twice.
  • Drive up to the speed limit as fast as you can then, while still in gear, release the throttle and let the vehicle coast to a complete stop.

Utilise Break-In Powders

They might be a little old-school, but many engine rebuilders still swear by them! We’re talking about break-in powders, like Caterpillar’s 7F5225 powder. Here’s how to correctly utilise a break-in powder when breaking in a rebuilt engine:

  • Reassemble and start the engine,
  • Loosen air cleaner on each bank of cylinders (leaving a gap between flange and inlet manifold),
  • Run engine at 800RPM and allow powder to be sucked slowly through gap (1.25 teaspoons per cylinder)
  • Tighten air cleaner, idle engine for 30 minutes, and it should be ready for service.
How long do I keep an engine running after a rebuild?

Used to run them at fast idle for about 1/2 hour with a cheaper oil and then drain that out and put in the factory spec oil.

Then my break-in routine was to rev the engine to only about 4000, and then release the gas and let the engine brake the car down to a slow speed, then once again up to 4000 rpm, and repeat this a number of times.

Always vary the speed during the first few hundred miles thereafter—don’t use cruise control at first, and you don’t have to be too gentle with the engine either. Just stay out of the redline.
Engine Break-In How To | Do It Right The First Time!

So you’ve spent a good amount of money building up you motor. You’ve carefully planned the entire build, from bearings to pistons, and crank to cams. No corners were cut in your pursuit of power, and you’ve got the receipts to prove it. But before you turn the key for the first time, there are a few important things to check, and neglecting them could be the worst decision you’ve ever made. Below we’ll go over the process of the proper engine break-in procedure.

  • Safety First
  • Priming The Engine
  • Proper RPM’s
  • Run Times
  • Oil Type and Oil Change Intervals

Safety First

Thoroughly inspect all moving parts you’ve touched during the removal of your old engine or installation of the new mill. Check coolant, gear oil (or ATF), and engine break-in oil for proper levels. Lastly, before you fire it up for the first time, ensure the parking brake is set, and the transmission is in neutral. It’s also a good idea to chock the wheels.

Priming the Engine

Priming the engine is as easy as removing the crankshaft position sensor and cranking the engine until the oil light shuts off. It’s also a good idea to remove the fuel pump fuse. if you don’t have an oil pressure light on your dash, purchase an aftermarket gauge so you can keep an eye on oil pressure. Ensure you’re making pressure while turning the engine with the CPS unplugged. If all is good, connect the CPS or Fuel Pump Fuse, and start the car.

Proper RPM’s and Engine Run Times

After the first start, let the engine run for 20 minutes at varying speeds between 2000 and 3000rpm. It is critical to vary the RPM’s for proper camshaft break-in and to ensure the piston rings and moving components are properly broke-in. After the first 20 minutes, inspect for oil, coolant, or fuel leaks. If all is good, take it on the road. Driving periods vary based on application, but no less than 30 miles is recommended. Head off to a low traffic area, where you can do long pulls at low load followed by engine braking back down to idle. This process is called “Vacuum Pulls” and helps seat the piston rings. Repeat no more than 50 miles and avoid open throttle and full boost scenarios. Watch your gauges like a hawk, and make any adjustments to your AFR’s at this point.

After the initial break in period, you’ll change your oil and then repeat the process until you’ve hit the 500 mile mark. After this, your engine will be fully broke-in.

Oil Change Intervals

Initial start up requires SAE 30 break-in oil and a new oil filter. If you dont have any SAE 30, conventional oil is fine. This oil will be in the engine from initial startup to the 50 mile mark. Change the oil at 50 miles, and again fill with SAE30 break-in oil or conventional oil type and run using the process outlined about for another 450 miles. At 500 miles, you’ll change the oil once again with conventional oil and a new filter. The last oil change you’ll make before completing the engine break-in procedure will be at 1500 miles, at which point will be conventional or synthetic oil and a new filter. From here on out, the typical 3000 mile interval is recommended.
How to Break In a Rebuilt Motorcycle or ATV Engine

If you spent hours rebuilding the engine in your motorcycle, ATV or side-by-side, the last thing you want to do is ruin all that hard work by failing to properly break in the motor.

The steps to follow for breaking in a rebuilt engine once it’s running again will vary slightly depending on the type of engine. For example, the steps for a high-performance street bike requiring high RPM for peak performance differ from a more sedate side-by-side that relies on lower RPM torque to get the job done. However, these steps more or less apply to all rebuilt engines.

Supplies Needed: Breaking In a New Engine

  • Oil
  • Oil filters

Adding Conventional Motor Oil

Fill the motor with a conventional engine oil, not a synthetic. Synthetic and semi-synthetic oils are too slippery and slick, which prevents the new piston rings and cylinder bores from seating properly. During the first few minutes of running, the piston rings and the walls of the cylinders need a small amount of friction so they can wear fractionally, and so their surfaces can conform to one another to form an effective seal. It’s this seal that gives an engine good compression, and it’s that compression that really adds to the performance of your rebuilt engine.

Static Engine Run to Operating Temperature

The first time you restart the motor after a rebuild should be a static run. Wheel the machine outside or make sure you’re in a well-ventilated space. Then, start the engine and bring it up to operating temperature while gently varying the throttle between idle and 50% open. Don’t go over 50% throttle at this point. Once the engine has warmed up, give it a thorough inspection for any leaks; listen for any odd noises; and look for any other mechanical issues such as excessive vibrations. Shut off the engine and let it fully cool down.

20-Minute Active Engine Run

An engine break-in happens mostly during the first 20 minutes of running after the rebuild. If you have access to a dyno, strap the vehicle down and vary the load on the engine between idle and 70% throttle. Otherwise, take the vehicle for a short ride to put a load on the engine. Vary the throttle between idle and 70% to push it a little harder than you did in the static test. Find somewhere without any traffic where you can safely run the vehicle while varying your speed to break in the engine.

Assuming everything goes well and there are no mechanical issues, start varying the throttle between 50% to 80% to further increase the load on the engine. Next, run the vehicle as you would in normal operating conditions. If it’s a competition motorcycle, run it like you would at the track. If it’s a UTV, run it like you would when hauling stuff.

First Oil and Oil Filter Change

After the initial 20-minute active run, give the motor another thorough inspection, and then change the oil and the oil filter. All the tiny pieces of metal that were sloughed off the piston rings, cylinder bores, bearings, etc. as they bedded-in are all now suspended in the oil and flowing around the engine. Drain out the oil and remove the oil filter to get rid of all that debris.

Install a new oil filter and refill the engine with oil. Once again, use conventional oil because the parts within the engine are still bedding themselves in and synthetic oil will hinder that process.

Normal Engine Running

This step will vary depending on the type of engine and how it will be used. If the engine is in a performance street bike, motocross bike, ATV or UTV, run it for 3-4 hours as hard and fast as you normally would. If the engine is in a cruiser bike, run it for 400-500 miles exactly as you normally would, regardless of how long it takes. If the engine is in an ATV or UTV, run it for a weekend (at least 6 hours) just as you normally would. Don’t baby the engine; run it as hard as you will every day thereafter.

Second Oil and Oil Filter Change

Once the engine has completed the normal running cycle, go ahead and change the oil and the oil filter again. By now the engine should have finished breaking in, and you want to remove every last trace of debris suspended in the old oil. Fit a new oil filter, and this time use the type of oil you’re going to use long-term in the engine, whether that be fully synthetic, semi-synthetic or conventional oil.
The Benefits Of A Transmission Engine Rebuilding

Tips for a Dirt Bike Bottom End Rebuild

Rebuilding the bottom end of your engine, whether two or four-stroke, can be a fun and rewarding job. Additionally, a considerable amount of money can be saved by taking on the work yourself versus tasking a shop to perform the work. These statements are only true, however, assuming the bottom end rebuild is performed correctly. This is a huge caveat, and for the average weekend warrior who doesn’t perform this task often, unfamiliarity with technique and componentry can lead to errors.

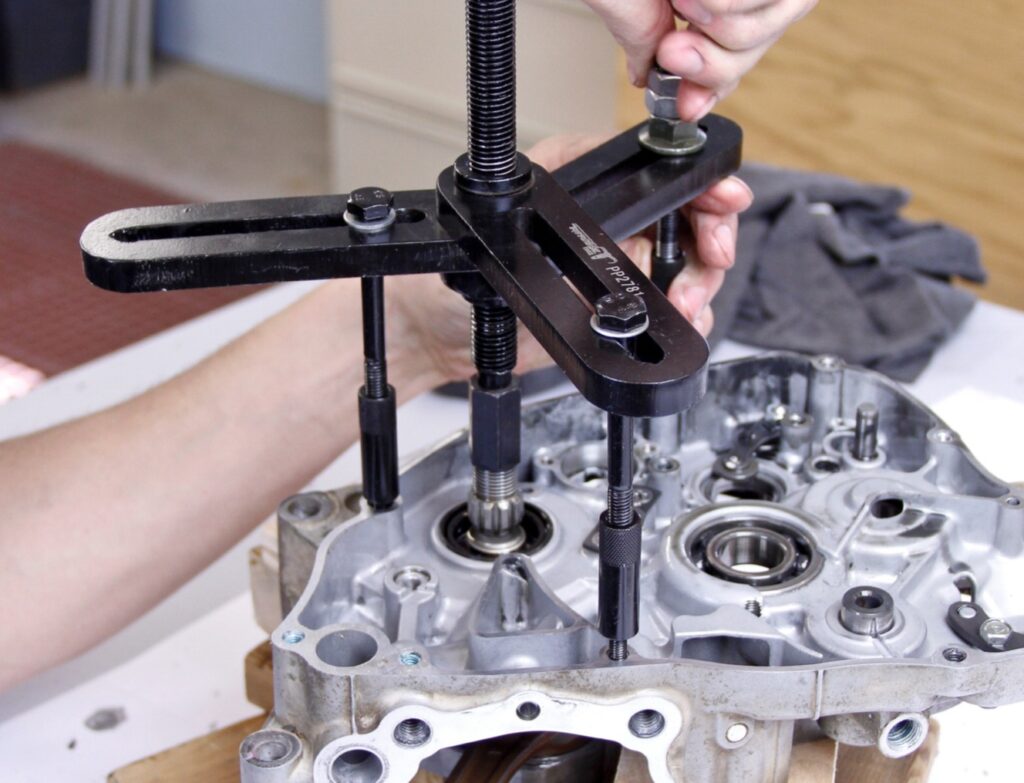
Successfully rebuilding your bottom end starts with planning and preparation. Starting with tools, you’ll need a few specialty tools in conjunction with your standard sockets, wrenches, etc. Namely, the correct flywheel puller for your specific engine, a flywheel holding tool, a crankcase splitting tool, a blind bearing puller, and a crankshaft puller. Using heat to assist in removal/installation of the bearings and crankshaft is an effective method, so an oven and freezer are also noteworthy items.

You need to have a copy of the factory service manual or equivalent for your particular vehicle. I highly recommend reviewing the sequence of events and procedure in advance of executing the work.

Bottom ends are taken apart for many different reasons. If a major failure occurred, the scrutiny of the rebuild will be at a much higher level than a bottom end that is merely being reconditioned. If any problems were persistent when the machine was operated, such as a poorly shifting gearbox, or leaks between the crankcases, the causation of these issues must be identified prior to reassembly.

Replacement components are a major factor to consider, both in terms of cost and engine performance, when diving into a bottom end rebuild. Replacing bearings, seals, gaskets, and refurbishing the crankshaft either by rebuilding or replacing it is essential. It’s recommended to peruse your service manual or microfiches ahead of the rebuild to generate a list of replacement components.

Handy XR600R rebuild tips

XR600Rs are pretty bullet-proof but when something does wear out or break there’s nothing much easier to work on (short of a two-stroke) than Honda’s big air-cooled single.

There’s no better guide to rebuilding an XR600R than the genuine factory service manual, but there are a few tricks that aren’t in it…and some anomalies that are.

Time for a refresh?

If something’s gone bang and you’ve got a rod poking out of the crankcase you know you’re up for a rebuild, but the most common reason for unbuttoning an XR600R engine is a top-end refresh.

A smokey exhaust and increased oil consumption are the first signs you’ll need to do some work – worn valve seals and piston rings are the usual suspects.

Oil consumption varies. Old (aren’t they all) XR600Rs can use as much as a litre of oil every 1000km and still run pretty good…but it’s a sign they’re well on their way out. By comparison a freshly rebuilt engine will probably use around 200ml per 1000km.

How to start your freshly rebuilt motor with confidence

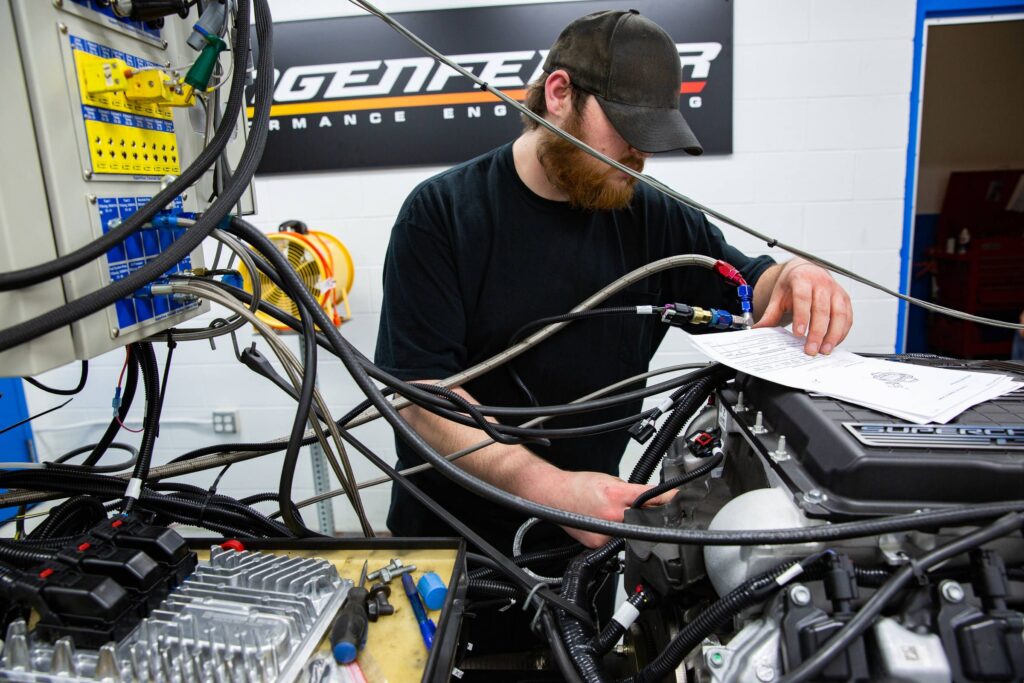
You’re dripping sweat in your home garage after just stuffing your freshly rebuilt engine into your beloved project car. After days, weeks or maybe months chasing down parts, heading to all the local machine shops and checking (and rechecking) all of the tolerances and procedures, you’re ready to put your pride on the line and light the candle. Hearing your engine run is the only thing you can think about, but these first few minutes the engine is running are the most important time of its life—and your pocketbook

Know what’s going into your engine

Mark Rapson, Lingenfelter’s VP of operations, says the most important thing about firing an engine is having it appropriately lubricated before you even think about hitting the starter button. “It’s like painting a car,” Rapson says. “People see a shiny color and clear coat on the outside, but it’s really the prep. It’s kind of the same thing with a motor. If the clearances aren’t set correctly or you don’t use the proper lubrication, no matter how diligent you are when you start it, you’re going to have failure.”

Choose your fluids

The engine oil and fuel debates will never end, especially as both continue to develop. Lingenfelter usually uses Royal Purple synthetic oils, except for initial engine firing—that’s when the team opts for a tried-and-true mineral oil. Engines using flat tappet camshafts probably will require more of the additive zinc dialkyldithiophosphate than engines with roller camshafts because of the high-wear nature of flat tappets.

Find your mistakes

Yes, you’ve made one, if not two. Even the folks at Lingenfelter had to chase some fuel-delivery gremlins in their state-of-the-art dynamometer cell. Check your engine for fuel, coolant and oil leaks, and make sure you’re getting power to all of the right places. For computer-controlled engines, make sure that you have the right ECU, tuned correctly for your first fire.

Prime it

Older engines that feature distributor-driven oil pumps sport a handy detail: easy priming. A tool available at nearly any auto parts store can attach to the chuck of a drill and spin the oil pump, priming it. Modern engines don’t rely on distributors, so Lingenfelter simply makes sure there is no fuel or spark and cycles the engine over with the starter to prime the oil system. With the proper assembly lube on the camshaft and other wear parts, this shouldn’t cause any excessive wear and should get oil heading into the right places.

Engine Replacement Tips

Engine replacement requires different approaches for every year, make and model. Consequently, I would suggest getting a service manual specific to your vehicle.

So, Engine replacement is much more complicated than simply pulling the old engine and bolting up a fresh one. If your vehicle is in relatively good shape engine replacement makes more sense than replacing the vehicle.

If Your Old Engine Had 150,000 Miles On It; So Do Other Parts Like;

Power steering

Air conditioner

Cooling system

Charging system

Starting system

Transmission

Sensors and relays

Some Basic Tips That Should Be Done Or Checked; Before Engine Replacement;

Check the motor mounts. Replace them if they are worn; loose or cracked.

Check the condition of the clutch or torque converter, transmission, CV joints, U-joints, etc., and make any repairs as needed.

Some items that will be mounted on the engine such as manifolds; brackets, accessories, spark plugs, oil filters, sensors, etc.; will probably be easier to install on the engine while it is still out of the vehicle. Preassemble as much as you can, then finish the rest of the items once the engine is in place.

Install new oxygen sensor(s). Also, highly recommended on high-mileage engines; to guarantee proper fuel feedback control; good fuel economy; and emissions compliance.

Install new belts and hoses (also, check automatic tensioners and idler pulleys and replace as needed).

Install a new coolant temperature sensor and thermostat. Also, highly recommended; to reduce the risk of overheating and possible engine damage.

Install new spark plugs, plug wires, distributor cap and rotor (if equipped).

Scan the computer for fault codes, fix any problems as needed, and clear the code memory.

Check for any (PCM) flash updates that may be available from the (OEM) and reflash the computer as needed.

Check for any engine related technical service bulletins that are out on the vehicle; and make any upgrades or changes as recommended.

Used Engines

A used engine is one that was likely pulled out a vehicle that was wrecked; or had damage to another one of its mechanical systems; that ended up sending the car to the junkyard.

CUMMINS ISX AND N14 ENGINES: TIPS AND TRICKS FOR REBUILD

The N14 and ISX engines are some of the most popular engines Cummins has produced, and even though the N14 has been out of production for years, many are still in use today. If you’re one of those people who is running either the N14 or the ISX, odds are you’ll need to do a rebuild at some point. We’ve compiled some tips and tricks to help you make the most of your next rebuild on your N14 or ISX.

Completing an inframe rebuild on an N14 is fairly standard, but you shouldn’t ignore the camshaft when you do it. The rebuild gives you the perfect opportunity to investigate for any additional signs of wear.

PROBLEMATIC VIBRATIONS

Unlike on the N14, removing the camshaft is more a part of the rebuild process on the ISX. Once the camshaft or camshafts have been removed it’s a good idea to check for other signs of wear.

CLEANLINESS

Whenever you’re working on your engine, cleanliness is very important. This is especially true of an ISX. This engine is highly sensitive to debris, and it especially becomes an issue when the oil passages are exposed. If debris gets in those passages it can damage other components, like the crankshaft.

GENERAL CHECKS

It’s also a good idea to take a minute or two to observe everything. For instance, check the rocker arm to see if the bushings show signs of wear. If copper is showing, then it’s a good indication that you should replace them.

Signs You May Need Transmission Repair

Transmission Repair Services

The transmission is one of your vehicle’s most critical and complex parts. It is responsible for taking the engine’s power and transmitting it to the drive axels through the use of different gears. When your transmission begins to slip or fail, it is almost always a cause for concern. Once you have decided that your transmission needs some help, you will need to decide on the three options for repair, rebuild or replacement. We service automatic, manual, and 4×4’s with our master certified transmission specialist standing by, and we also offer box truck transmission repair and some RV transmission repair.

Transmission Repair

This is typically the lowest priced option and can be applied if there are only minor issues with the transmission

Other problems such as a clicking or whining noise, gear slipping, missing forward or reverse, and delayed or erratic shifting may also be due to some similar problems such as a defective solenoid or low fluid levels. However, they might also be due to more serious issues, which brings us to the next option in transmission repair.

If the transmission has enough damaged or worn parts, then a complete rebuild might be necessary. In the event of a rebuild, the entire transmission is removed from the car, taken apart and fully inspected. Worn, defective, damaged or failed parts are removed and replaced with fully functional quality parts. The transmission is then reassembled and installed back into your car. Transmission rebuilds require specialists as it is a custom process for each unique vehicle.

Remanufactured or Replaced Transmission

In some cases, the entire transmission must be replaced. Depending on the vehicle, there may not be any brand new transmissions available, so instead, you will be getting a remanufactured or refurbished transmission. In a replacement job, you will be getting a full transmission with all parts replaced and brand new. This is generally done in a factory setting and not at the closest transmission shop

Things To Consider When Choosing The Right Transmission Treatment For Your Customers

Of all the things that can go wrong with a customer’s vehicle, a transmission problem is often one of the most dreaded. That’s because the cost of a transmission rebuild or replacement can run up to $4,000. When faced with a bill this big, many owners of older vehicles decide to start looking for a new car rather than fix the transmission in the current one.

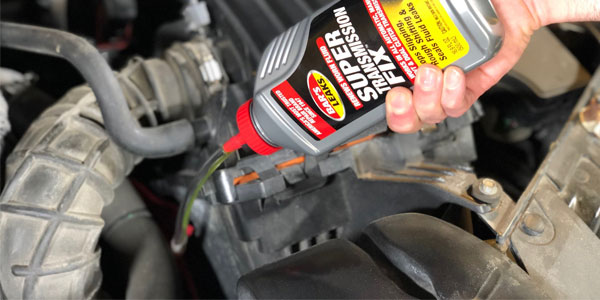
But not all transmission trouble has to break the bank or result in the end of a vehicle’s life. Depending on the severity of the problem, you might be able to save your customer thousands of dollars by recommending a chemical repair product designed specifically for transmissions.

But which one? There are a number of transmission stop-leak and repair products on the market. Some are designed specifically for automatic transmissions or manual gear boxes. Others were developed to take on the complexity of continuously variable (CVT) or dual-clutch (DVT) transmissions. Additional considerations when choosing the right product include evaluating exactly what’s wrong with the customer’s transmission. What symptoms are they seeing? Low transmission-fluid levels and puddles under the vehicle? A warning light? Slipping, jerking and shudder?

Reading product labels or even visiting the manufacturer’s website can help you choose the right product to recommend. Or you can save your customer time and money by recommending an all-in-one product that stops leaks and improves shift performance on most cars, trucks and vans regardless of transmission.

Repair Shop Partner

There’s a lot of uncertainty surrounding car maintenance and repairs. Many drivers are unaware of when specific tune-ups and repairs are necessary, so it’s natural to doubt a mechanic who says your car needs work when it seems to be driving just fine.

TRUSTWORTHY & COMPETENT

Everyone wants a mechanic who does the job right at a fair price. Auto repair shops that partner with CarMax are routinely screened for quality, training, tools, and pricing. This gives you peace of mind, knowing that when you choose a trusted CarMax partner, you’re getting the best service at the best rate.

INDEPENDENTLY OWNED

All participating CarMax partners are independent auto repair shops. When you take your car to one of these locations, you’re supporting a local business in your community. Plus, there are over 2,600 shops in the RepairPal Certified Network, making it the largest nationwide trusted network of auto repair shops in the US. Whether you’re in La Habra or your car breaks down on a road trip in another state, you’re bound to find a certified partner near you.

Too many drivers have experienced the pain that comes with switching between auto repair shops. It’s difficult to know which mechanic you can trust, or how to tell if you’re getting ripped off when you go in for a repair. That’s why RepairPal created a process to identify which shops have committed to delighting their customers with high-quality services and predictable prices.

RepairPal is a leading provider of automotive service and repair, with a nationwide network of certified shops that meet all the necessary requirements. RepairPal’s mission is to give drivers confidence when seeking the maintenance and repairs they need for their car. Great experiences should be possible throughout the vehicle ownership lifecycle, from routine oil changes and smog checks to transmission services and engine overhauls.

Where to Go for Car Maintenance and Repairs

Before you consider where to take your vehicle for maintenance and repair, you need to understand the difference between the two. Routine maintenance items are those listed in your vehicle’s owner’s manual as part of the model’s service schedule. They are intended to keep your vehicle in top operating condition. Repairs are service that needs to be performed to fix a problem. Where you take your vehicle may depend on what needs to be done.

Scheduled maintenance can be performed at any dealership; you don’t have to go to the one where you bought the vehicle. Likewise, you can take your vehicle to an independent auto-repair shop or franchise, which are typically less expensive than dealerships. Federal law gives you the right to service your vehicle wherever you like without affecting your warranty coverage. (Depending on the contract, lessees may be required to have all service performed at a dealership.) Mechanics in your dealership’s service department are specifically trained and certified in all aspects of your model’s service needs, and the shop will be equipped with all of the necessary diagnostic equipment. Because maintenance items are fairly basic, however, any professional auto shop should be able to perform the necessary tasks.

Wherever you go for service, make sure they have access to the manufacturer’s latest technical service bulletins (TSBs), which are basically instructions on how to fix common problems with a particular model. Often, an automaker will do TSB repairs for free, but you’ll have to go to a dealership to get the work done.

Repairs can range from basic tasks such as a brake job or auto-body repair to complicated service such as overhauling a transmission or diagnosing an electronics-system problem. Go to a dealership if your car is covered by the original warranty and you want the manufacturer to pay for the fix. Use a dealership, too, if your car has been recalled or is the subject of a “service campaign” in which the automaker offers to correct a defect. If you have an extended warranty, you’ll need to check the terms to see who must perform covered repairs.

If the vehicle is out of warranty, the type of problem may determine where you take it for repair. A reputable independent shop should be able to handle most common repairs. Shops that specialize in your vehicle’s brand are more likely to have the proper training, equipment, and up-to-date information. A good technician will let you know when a problem warrants a trip to the dealership or a speciality shop.

Choosing a Transmission Repair Shop

Transmission service and repair is anything but cheap. Therefore, when you choose a repair shop you had better ensure it is a choice you will not regret. On average, a transmission repair cost will range between $1000 to $4000. The last thing you want after paying this much is a slipshod service and you end up with transmission problems, again.

Poor repairs mean you end up spending more and unfortunately, the problem does not end. You must choose the right and in most case pay the price for a good service. To cut the chase, there are a few things you must look into before settling for your clutches and transmission repairs shop.

Ask for recommendations

You are not the only one who owns a car. Your family, friends, and neighbors own one too and they must have experienced transmission auto repairs. Ask them for recommendations for they may know some great repair shops. Your interest should be on their experience, how much they paid and if they got excellent customer service. If yes, you may not have to search any farther.

Keep away from cheap and over-the-top repair services

Well, repairs are not cheap. But this does not mean you have to pay an arm and leg for your car. Any shop charging expensively may not be honest. Can they really account for that exaggerated figure in what they will tackle in your car? Probably not

Certified mechanics

Anyone with spanners and greasy apron can claim to be a mechanic (after all, those are their tools of trade). But would you trust just anyone to work on your car’s transmission? No way. You have to check and ascertain that the mechanics are certified by the relevant national or state body. If they are, you can relax knowing that your car is in the best hands. This is someone who is trained for the job, has impressive experience in the field, and most importantly is passionate about their work.

Auto Repair Help Troubleshooting

Tips for Selecting Auto Repair Shops

If and when you’re dealing with auto repair problems, it can be a time-consuming process finding the right shop, but asking the right questions is key. Learn important tips that will help you select the right shop

If and when you experience troubles with your car, time can be of the essence. For many drivers, dealing with a work schedule and other responsibilities like family make having a working car an absolute necessity

Ask around

Often the best referrals come from your friends and family who have had experience using the mechanics in your area. Getting a word-of-mouth referral from a friend or family member can also mean you’ll get an honest insight about their experience with those repair shops, which can help save you money or avoid a scam.

Shop around before an emergency

If your radiator is smoking or your car won’t run at all, chances are you are in a hurry to fix the problem. If you are in a rush to get your car to the shop, your judgment might be clouded; this may influence you to make a hasty decision based on needing your car back immediately, rather than saving money and receiving top-notch service.

Don’t choose based solely on price

While price may affect your choice, since you want an affordable rate, do not just opt for the cheapest choice. Do your research and compare. The cheapest rate may not always have the worst services; likewise, the most expensive might not offer the highest level of service.

Tips for Choosing a Car Repair Shop

Most people will always have a hard time deciding on which car shop to choose because a wrong choice can be costly. Some car repair shops are in business to take car parts that are new from their clients while they give the old and less efficient car parts. Those are the type of auto repair shops that you need to avoid by all means. This article provides you with essential tips that will enable you to find the right auto repair shop.

Do your Homework

Before choosing an auto repair shop, it is essential to make sure that you are well informed. Ask the people around what they think about the auto repair shop whose services you seek. They will always advise you accordingly. Apart from asking around for more information, you can always do your research on the internet.

Consider Online Reviews

Also, before choosing an auto repair shop, it is important to read online reviews. It is here where you will get all the hidden things that you might want to know about the shop. For instance, if there are people who used the services from the shop and they were dissatisfied for one reason or the other, you will get to know.

The Reputation

Great auto shop repair companies will always have a good reputation. This is because they are dedicated to offering quality services to their clients. They know that if they fail to serve their clients right, they are not going to get many customers as they would have wished. Checking the online reviews will always tell you more about the reputation of the company

Experience

When looking for car repair shops, it is a good idea that you choose the one that has a good experience. This is important because, through the experience of handling different cars, it means that they have skills that they can use to solve any problem. You would not want to give your precious car to people who might end up interfering with it one or the other.

Tips for Choosing the Right Auto Repair Shop

Ask friends and family for their recommendations. After all, it’s often their opinions that you value most, and unless asked directly, most people won’t offer their advice on their favorite shop or mechanic, it’s just not the most interesting topic!

Choose an auto repair shop before major repairs are needed. It’s a lot easier to choose a shop without the pressure of needing immediate repairs. It also gives you time to better weigh your options.

Pick a shop that employs ASE Certified Technicians. ASE Certified Technicians are mechanics who have gone through rigorous training and testing to be experts in their automotive fields. You can trust they will take good care of your automobile

Make sure the auto shop your choose works on your make and model of vehicle. Some repair shops are specialized, so be sure that the shop you choose has mechanics that are certified to work on your type of vehicle

See if the shop has transportation options available. In the case that a major repair arises, can the shop give you a lift back home or to the office? Many auto repair shops will accommodate your transportation needs (within reason), so be sure to call and ask if a free local shuttle service or loaner cars are available

Tips for Choosing the Best Auto Repair Company to Fix Your Car

A car can protect you and your family from external elements and road hazards. But sometimes, the danger comes from within and it is no one but the car owner’s fault. A vehicle that has been neglected and gone a long time without service is sure to have some malfunctioning components that can endanger the life of your family.

License and Certification

Besides shady auto repair services, a lot of people like cars and will offer you a bargain price to fix your vehicle. Don’t do it. You should only get your car fixed by a licensed and certified mechanic. When someone other than a qualified auto repair mechanic tinkers with your vehicle, it can void your warranty and can even lead to more problems in the future.

Visit the Staff

One of the best ways to reassure yourself that your car will be in good hands is to simply book a visitation appointment over the phone or through an email. During the visit, judge how the staff is treating you. If they are cordial and cooperative, it means your car will experience the same treatment. If they are impatient and rude, don’t trust them with your vehicle.

Check the Reviews

Word-of-mouth and referrals still remain the best form of organic advertising to this day. Now with the internet, it is getting easier and easier to see what others are saying about an organization. At PA Auto Inspection, we encourage our prospective customers to check out what our past customers are saying about us. Our review page is filled with honest testimonials of several happy customers who have had their cars fixed from us with very satisfactory results. You can also check out social media and Yelp reviews to see what people are saying about our service.

Pricing

Although there is an industry standard for many types of auto repairs, they can vary a bit from mechanic to mechanic. When you are looking for a good automotive repair and service company, don’t be afraid to look around for the ones that give you the best price rather than settle for the first one you see.

How to Find a Good Mechanic

Find Out Who Services the Big Business Fleets in Your Area

Delivery vans, taxis, company cars, government vehicles – they all have to stay on the road, so you better believe they’re taken to a good mechanic when they need maintenance work or repairs.​

Search for a Good Mechanic Online

The Mechanics Files over on CarTalk is a great place to look for a mechanic recommendation or to check up on a mechanic that you’re considering. It features reviews of over 30,000 mechanics!

Choose Someone From the AAA-Approved Auto Repair Network

Even if you don’t have AAA, choosing a shop from their Approved Auto Repair Network can be a great way to vet a mechanic. All participating shops must offer 12 month/12,000 mile warranties on all repairs, use ASE or manufacturer-certified technicians and pass an annual AAA inspection

Look Up ASE and Manufacturer-Certified Shops

When a mechanic is certified by the National Institute for Automotive Service Excellence (ASE), the manufacturer of the particular make of car that they work on or both, that’s a pretty good indication that they know their stuff.

heck With the Better Business Bureau

Once you’ve narrowed it down to a few mechanics, do a quick search on the Better Business Bureau website to check up on their ratings and reviews.