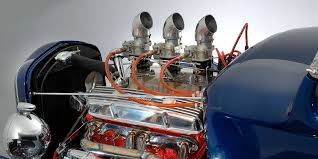
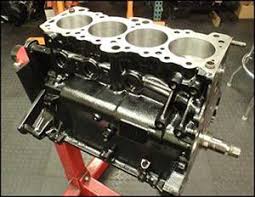
Steps To Recondition An Engine Rebuilding

How to break in a rebuilt engine

The two most commonly used methods to break in a rebuilt engine are dynamometer or load bank testing. However, these methods of engine testing aren’t always possible. If a rebuilt engine isn’t broken in correctly issues can arise including high oil consumption, excessive smoking and overall poor engine performance. This blog article looks at how to break in a rebuilt engine without the use of a dynamometer or load bank…

Why should you break in a rebuilt engine?

The process of breaking in an engine involves forcing rings and cylinder bores to conform to each other, sealing the combustion gasses within the cylinders. Unfortunately, idling the engine for a period of time will not create the pressures needed. Without serious force, piston rings may not seal properly – resulting in poor oil control and diminished engine performance overall.

Dangers of not breaking in a rebuilt engine

Improper or inadequate breaking in of rebuilt engines causes what is known as ‘glazing’, which prevents piston rings from ever sealing correctly. Glazing refers to how hard oil and fuel deposits collect on the cylinder walls of an engine. Once this happens, the only way to rectify the issue is to dismantle the entire engine again and break it in correctly.

Just rebuilt an engine? Here’s how to break it in:

Apply Make-Shift Loads

Most engine rebuilders agree that to correctly seal the piston rings, you need to focus on getting around 75% of full load on the rebuilt engine for a few hours – keeping idle time to a minimum. Ways of breaking in vehicular engines include:

  • Attach a heavy trailer, find a long steep hill, and drive up it once or twice.
  • Drive up to the speed limit as fast as you can then, while still in gear, release the throttle and let the vehicle coast to a complete stop.

Utilise Break-In Powders

They might be a little old-school, but many engine rebuilders still swear by them! We’re talking about break-in powders, like Caterpillar’s 7F5225 powder. Here’s how to correctly utilise a break-in powder when breaking in a rebuilt engine:

  • Reassemble and start the engine,
  • Loosen air cleaner on each bank of cylinders (leaving a gap between flange and inlet manifold),
  • Run engine at 800RPM and allow powder to be sucked slowly through gap (1.25 teaspoons per cylinder)
  • Tighten air cleaner, idle engine for 30 minutes, and it should be ready for service.

How long do I keep an engine running after a rebuild?

Used to run them at fast idle for about 1/2 hour with a cheaper oil and then drain that out and put in the factory spec oil.

Then my break-in routine was to rev the engine to only about 4000, and then release the gas and let the engine brake the car down to a slow speed, then once again up to 4000 rpm, and repeat this a number of times.

Always vary the speed during the first few hundred miles thereafter—don’t use cruise control at first, and you don’t have to be too gentle with the engine either. Just stay out of the redline.

Engine Break-In How To | Do It Right The First Time!

So you’ve spent a good amount of money building up you motor. You’ve carefully planned the entire build, from bearings to pistons, and crank to cams. No corners were cut in your pursuit of power, and you’ve got the receipts to prove it. But before you turn the key for the first time, there are a few important things to check, and neglecting them could be the worst decision you’ve ever made. Below we’ll go over the process of the proper engine break-in procedure.

  • Safety First
  • Priming The Engine
  • Proper RPM’s
  • Run Times
  • Oil Type and Oil Change Intervals

Safety First

Thoroughly inspect all moving parts you’ve touched during the removal of your old engine or installation of the new mill. Check coolant, gear oil (or ATF), and engine break-in oil for proper levels. Lastly, before you fire it up for the first time, ensure the parking brake is set, and the transmission is in neutral. It’s also a good idea to chock the wheels.

Priming the Engine

Priming the engine is as easy as removing the crankshaft position sensor and cranking the engine until the oil light shuts off. It’s also a good idea to remove the fuel pump fuse. if you don’t have an oil pressure light on your dash, purchase an aftermarket gauge so you can keep an eye on oil pressure. Ensure you’re making pressure while turning the engine with the CPS unplugged. If all is good, connect the CPS or Fuel Pump Fuse, and start the car.

Proper RPM’s and Engine Run Times

After the first start, let the engine run for 20 minutes at varying speeds between 2000 and 3000rpm. It is critical to vary the RPM’s for proper camshaft break-in and to ensure the piston rings and moving components are properly broke-in. After the first 20 minutes, inspect for oil, coolant, or fuel leaks. If all is good, take it on the road. Driving periods vary based on application, but no less than 30 miles is recommended. Head off to a low traffic area, where you can do long pulls at low load followed by engine braking back down to idle. This process is called “Vacuum Pulls” and helps seat the piston rings. Repeat no more than 50 miles and avoid open throttle and full boost scenarios. Watch your gauges like a hawk, and make any adjustments to your AFR’s at this point.

After the initial break in period, you’ll change your oil and then repeat the process until you’ve hit the 500 mile mark. After this, your engine will be fully broke-in.

Oil Change Intervals

Initial start up requires SAE 30 break-in oil and a new oil filter. If you dont have any SAE 30, conventional oil is fine. This oil will be in the engine from initial startup to the 50 mile mark. Change the oil at 50 miles, and again fill with SAE30 break-in oil or conventional oil type and run using the process outlined about for another 450 miles. At 500 miles, you’ll change the oil once again with conventional oil and a new filter. The last oil change you’ll make before completing the engine break-in procedure will be at 1500 miles, at which point will be conventional or synthetic oil and a new filter. From here on out, the typical 3000 mile interval is recommended.

How to Break In a Rebuilt Motorcycle or ATV Engine

If you spent hours rebuilding the engine in your motorcycle, ATV or side-by-side, the last thing you want to do is ruin all that hard work by failing to properly break in the motor.

The steps to follow for breaking in a rebuilt engine once it’s running again will vary slightly depending on the type of engine. For example, the steps for a high-performance street bike requiring high RPM for peak performance differ from a more sedate side-by-side that relies on lower RPM torque to get the job done. However, these steps more or less apply to all rebuilt engines.

Supplies Needed: Breaking In a New Engine

  • Oil
  • Oil filters

Adding Conventional Motor Oil

Fill the motor with a conventional engine oil, not a synthetic. Synthetic and semi-synthetic oils are too slippery and slick, which prevents the new piston rings and cylinder bores from seating properly. During the first few minutes of running, the piston rings and the walls of the cylinders need a small amount of friction so they can wear fractionally, and so their surfaces can conform to one another to form an effective seal. It’s this seal that gives an engine good compression, and it’s that compression that really adds to the performance of your rebuilt engine.

Static Engine Run to Operating Temperature

The first time you restart the motor after a rebuild should be a static run. Wheel the machine outside or make sure you’re in a well-ventilated space. Then, start the engine and bring it up to operating temperature while gently varying the throttle between idle and 50% open. Don’t go over 50% throttle at this point. Once the engine has warmed up, give it a thorough inspection for any leaks; listen for any odd noises; and look for any other mechanical issues such as excessive vibrations. Shut off the engine and let it fully cool down.

20-Minute Active Engine Run

An engine break-in happens mostly during the first 20 minutes of running after the rebuild. If you have access to a dyno, strap the vehicle down and vary the load on the engine between idle and 70% throttle. Otherwise, take the vehicle for a short ride to put a load on the engine. Vary the throttle between idle and 70% to push it a little harder than you did in the static test. Find somewhere without any traffic where you can safely run the vehicle while varying your speed to break in the engine.

Assuming everything goes well and there are no mechanical issues, start varying the throttle between 50% to 80% to further increase the load on the engine. Next, run the vehicle as you would in normal operating conditions. If it’s a competition motorcycle, run it like you would at the track. If it’s a UTV, run it like you would when hauling stuff.

First Oil and Oil Filter Change

After the initial 20-minute active run, give the motor another thorough inspection, and then change the oil and the oil filter. All the tiny pieces of metal that were sloughed off the piston rings, cylinder bores, bearings, etc. as they bedded-in are all now suspended in the oil and flowing around the engine. Drain out the oil and remove the oil filter to get rid of all that debris.

Install a new oil filter and refill the engine with oil. Once again, use conventional oil because the parts within the engine are still bedding themselves in and synthetic oil will hinder that process.

Normal Engine Running

This step will vary depending on the type of engine and how it will be used. If the engine is in a performance street bike, motocross bike, ATV or UTV, run it for 3-4 hours as hard and fast as you normally would. If the engine is in a cruiser bike, run it for 400-500 miles exactly as you normally would, regardless of how long it takes. If the engine is in an ATV or UTV, run it for a weekend (at least 6 hours) just as you normally would. Don’t baby the engine; run it as hard as you will every day thereafter.

Second Oil and Oil Filter Change

Once the engine has completed the normal running cycle, go ahead and change the oil and the oil filter again. By now the engine should have finished breaking in, and you want to remove every last trace of debris suspended in the old oil. Fit a new oil filter, and this time use the type of oil you’re going to use long-term in the engine, whether that be fully synthetic, semi-synthetic or conventional oil.

Easy Tips On How You Can Prepare Your Crib For A Home Remodeling Project

Remodeling Guides

Assemble a Good Team

Don’t jump to hire the least expensive designer, architect or builder unless they also come highly rated, well-regarded and positively reviewed. Have a thorough chat with their past clients to make sure there are no red flags. Ask to see examples of recently completed projects to make sure they have a proven track record.

Hiring the best team may mean having to cut back on something to make the budget work. But I guarantee it will be money well spent. And often you’ll save more money in the long run than if you had simply gone with the lowest bid.

On a related note, it’s a good idea to bring together professionals who have prior, positive experiences working together. Ask your architect or designer to recommend builders they’ve previously worked with. Or if you have a great builder on board but need an architect or designer, ask the builder to recommend someone they have a proven track record with. Think of it like a good marriage — you want to bring together people who can communicate effectively and resolve problems quickly, efficiently and amicably.

Settle Budget and Scope Before You Begin

Before you even start dreaming about demo day, get a firm handle on your project scope and budget. I’ve seen this scenario happen to people before: Imagine being on year two of a remodel that was originally supposed to be just a master suite renovation. You experienced major “scope creep” and started adding and adding to the project, then got stopped in your tracks when the city caught wind and insisted you update your permits (something that can take ages to resolve in a place like). You’ve gone over budget, especially since you had to cover such a long stay in temporary housing. And so on.

Include Budget and Timeline Contingencies

Make sure you are prepared for “worst-case scenarios” because, inevitably, they’ll happen. You’ve probably heard it’s a good idea to add a 1% to 20% contingency to your budget, but you should also add the same amount to your timeline

How to Stick to Your Remodeling Goals

Remodeling is a great way to stay in the house you have. Plus, making changes can improve the way you live. But everyone has heard the horror stories of going 50% or more over the remodeling budget. Truth be told, even contractors will admit that it’s hard to provide an exact price on the work, because there are often unforeseen circumstances that could cause the price to rise. I always recommend factoring in about 20% over what you think you should budget. But knowing what you want from the very beginning — and sticking to those goals — can greatly help your project stay on track. Even if it seems like it’s going off the rails.

Are you seeking to increase resale value? Improve layout? Improve energy efficiency? It could be a combination of a number of things, but make sure you’re being rational. If you want pro-style appliances but you eat out most evenings, you might want to reconsider.

In one project our client wanted to double the size of his kitchen because it felt like he had no counter space. Instead of just going for space, we talked to him about how he prepares meals and worked to increase the amount of usable counter space rather than just making the kitchen bigger.

Create a budget you’re comfortable with, then set aside 20% of that to cover the unknowns that inevitably come up. This is your “build to” budget. During the design phase, your designer should make you aware of the amount that is your build-to budget. You should avoid the temptation to spend your contingency before you begin construction. A contingency is not a slush fund that, if you can avoid spending, you can direct toward appliance and finish upgrades.

A contingency is an integral part of the cost of building, especially remodeling, that is as deserving of budget allocation as any other component of your project. Unknowns are very hard to predict and can easily drive your project over budget otherwise.

Home Renovation Guide

There comes a time for every homeowner when they look around their property and think, “Should I sell, or should I just stay and renovate?”. It’s anything but an easy decision, especially in an expensive real estate market such

The Pantone Colour of the Year is used to influence trends in a variety of industries for the upcoming year such as fashion, home decor, and product designs. For 2020, Classic Blue is the colour to ring in the new decade and the colour that everyone should include in their homes to encourage goods vibes

The holidays are a joyous time. The lights are twinkling, Christmas markets provide weekend entertainment, delicious cookie tins fill the grocery stores and there’s always a party going on in the evening.  At the same time, the holidays can be surprisingly dangerous.

If you are looking at houses for sale but don’t quite see one that fits your personality, consider the major changes you can make with just a coat of paint. When it comes to painting your home, though, there are a number of decisions that you’ll need to make to get your desired look.

Home renovation projects can be very exciting to take on. Not only can they boost the value of your real estate, but they can also create a more enjoyable space for you and your family. That being said, these projects can be a little stressful if they’re not properly planned.

Homeowner’s Workbook: How to Remodel Your Bathroom

So you’re ready to remodel that bathroom. Congratulations! As you probably already know, you’ve got some tasks ahead of you. Even with the help of a professional bathroom designer and a general contractor who will take care of the construction and installation, a lot of the mental work inevitably falls right on you, the homeowner

So it’s going to be up to you where you want things to go, how much you want to spend, what you want it to look like and how you want it to function. This step-by-step workbook will help you navigate the process through the planning and conceptual phases. Just remember to keep your eye on the prize, and seek the help and guidance of people who’ve been there before.

What Are You Trying to Achieve?

It seems like a simple enough question that should have a simple answer: “Well, I need a new bathroom.” But when embarking on a journey that will take a good chunk out of your time and bank account, you want to get it right. And you want to be happy with the end result.

Before you do anything, think about what your ideal bathroom would be. Forget constraints of money and space; just imagine what you want and what the intended purpose will be. Who is this bathroom for? Is it a master bathroom? A powder bathroom? A kid’s bathroom? How often will it get used and what will the function be?

Other considerations:

How many people will use it?

How much time do you spend in the bathroom during the morning, afternoon and night?

What’s your routine — how does your current space hinder it and how could a new space improve it?

Do you plan to grow old in this house?

Do you have medical issues like poor eyesight or arthritis to consider?

Do you just want something that’s easy to clean?

Is storage the catalyst? Relaxation?

Or do you just want to update the look for resale?

Your Guide to a Smooth-Running Construction Project

Imagine walking into your newly built or remodeled home and seeing it exactly as you had imagined it at the start of construction: the windows are all in the right places, the flooring is the right color, and the kitchen cabinets are a perfect fit.

Now allow me to pinch you on the arm, because for most people, reality is often different from that idyllic scenario. You might see missing trim around the bedroom doors or wonder why that small change in the kitchen cost so much. Looking back, you might ask, “And why did we have to hire another subcontractor to finish the bathroom?”

Of course, there are things you just can’t plan for, but there’s plenty that you can. Costly changes and additional time-consuming work can be kept to a minimum if you fully understand what you are building before you start. By understanding the construction process, being part of the team and keeping a firm grip on the budget, your construction project can result in the home of your dreams.

Don’t Skimp on Design Help

Given the busy lives most of us lead, we don’t have the time to research every type of technology and material that might be used on a construction project. Use professionals to save some of the time that would otherwise be spent learning and perfecting the process.

Architects are trained not just to make a project pretty but to match building systems, thermal envelopes and other properties to the client’s needs. They have a broad, up-to-date knowledge of these systems as well as of materials and processes for a wide variety of project areas.

How To Select The Best Contractor For Your Roof Inspection Needs

How to Inspect a Roof for Damage

When assessing property for flipping, knowing a bit about roofs and the basics of how to inspect a roof will help you prevent overlooking a costly expense. Depending on the material, square footage, type of roof, slope, architecture, and number of interruptions such as chimneys, skylights, dormers, and vents, a roof replacement can cost thousands of thousands dollars. And because many buyers hire home inspectors, an overlooked needed roof replacement can come to light during the selling process and cost you a property sale.

What to look for When Checking a Roof

You can hire a property inspector that includes a roof inspection when you purchase a property or do this yourself. However when you are evaluating a property before purchase and because you will no doubt check out dozens if not hundreds of homes for sale when looking for deals, hiring an inspector for each one would soon eat all your profits. You can learn the basics of how to inspect a roof, limit unwanted surprises, and save thousands in the flipping business.

While any documentation that tells when the roof was installed or last replaced on a property is valuable, you will still need to check the roof. A visual roof inspection requires knowing what to look for. You can climb up to the roof, use binoculars to inspect the condition or even a drone mounted camera. In addition to the roof, inspect under the eaves and overhangs, the fascia, and guttering for any water damage. Check around all roof interruptions such as skylights, dormers, chimneys, roof mounted antennas or satellite dishes, and vent pipes.

During the inspection, below are some of the things you need to look at:

Inspect Your Roof’s Gutters

The first thing we always do when doing a roof inspection is to look at the gutters. If your contractor has a detailed report on the gutter situation of your roof, then that is a good sign they know what they are doing. A contractor should always look at how the gutters are attached. This is because the drip edge cannot be replaced if the gutters are attached through the drip edge. In addition, if there is a gutter guard, then it may need to be removed if a new drip edge is needed, which will cost more in terms of time and labor. While looking at the gutters, the contractor should also take a peek at the underlayments to see what exist there and to get an overall better picture at how the roof was initially constructed.

Make Sure To Inspect Your Roof’s Flashing

The flashing is another important detail a contractor should carefully consider when giving an estimate. Without getting up on the roof, they will not be able to tell whether or not it needs to replaced, as well as what kind of flashing it is. If the contractor doesn’t bother to check out the flashing, they are is no way they can accurately estimate the cost or what the process will be like. As a result change orders will likely be necessary which can be a major headache for homeowners.

Check the Valleys

Valleys are the places where water runs off of your roof and into your gutters. Water and debris can cause these areas to sustain more wear than the rest of your roof, so take a closer look at those valleys to check for damage and heavy wear.

Inspect Caulking

Materials around vent pipes and chimneys can deteriorate over time. Look for gaps, cracks, missing caulking, or places where caulking is starting to fracture. If your caulking needs work, but the rest of the roof is in good condition, you may only need to caulk. It’s best to catch before water damage turns into a big problem.

Interior Inspection

Although most people understand the need to have the outside of their roofs inspected, it is recommended that you start examining your roof from the inside. To do this, grab your flashlight and go right to the attic. Here you should check the roof and make sure that there are absolutely no any issues that might cause problems and yet go unnoticed during the exterior inspection. Check out for those areas where the roof deck could be sagging, signs of leaking or water damage, dark spots and trails or any holes in the roof.

Exterior Inspection

Once you are done with inspecting the inside, you need to go right outside to examine the top part of your roofing. Here you should look out for any missing or damaged shingles, algae growth, rotting, blistering or curling. Check whether there are any loose materials or any wearing close to the chimney, pipes, vents or other roof penetrations. You need to look out for large amounts of granules within the gutters as this may be an indication of advanced wear on your roof. Check for the presence of mould or hidden moisture.

The Drainage

To avoid issues of water damage, you need to examine the drainage of your roof. The downspouts and gutters should be securely attached and the drains open to allow for easier exiting of the water. In case the downspouts and trenches are filled with debris, the water from your roof may have nowhere to go, hence start causing problems to your roof. All the kitchen, bath and dryer vents should go right outside of your home. This will help prevent the buildup of moisture in your attic, which could severely damage your roof.

Roofing Materials

There is a wide range of roof types, and the materials that are used on your roof can determine how long your roof will last. In case your roof is made of cedar, you will know that it needs repair or replacement when is becomes mossy or when it starts splitting and falling apart, especially in dry weather. If it is comprised of tiles, then you should check out for cracks, breakages, misplaced or missing tiles. For metal sheet roofs, you need to check out for the presence of rust.

When inspecting your roof, it is also essential to check the supporting materials such as timber and make sure that they have not been infested or eaten away by pests such as termites or wood borers.

Why To Hire A Professional Carpet Flooring Cleaner

Choosing a Non-Toxic Carpet

Recently, I’ve had a few private consulting clients ask about non-toxic carpeting. As a result, I’ve spent some time more deeply looking into this.  I hope this post helps answer the big question: Is there such thing as truly safe, non-toxic carpeting?

What Makes Carpeting Toxic?

As my dad wrote in the flooring post about our non-toxic renovation undertaking, Project One-Eleven, carpeting is problematic for a variety of reasons, including:

The chemicals and materials used to make the carpets and pads beneath them, including plastics, wool that’s laden with fungicides, synthetic rubber that may contain endocrine-disrupting phthalates, toxic dyes, and chemicals that are meant to repel flame, water, and stains.

The materials used in the carpet installation process, including glues and other adhesives that contain formaldehyde and a range of VOCs that off-gas into the home environment.

Carpet’s tendency that to accumulate dust mites, dirt, pesticides, and other toxins brought into our homes on our feet (and our pets’ feet!).

So Are All Carpet Bad News?

The older the carpets, the more likely they are to contain bad chemicals and pounds of accumulated junk. So I’d say that yes, old carpets are categorically bad news. But because we have some really safe options available these days, newer carpets can be a good choice for your home.

And this is important: In addition to choosing safe carpets, you should clean them according to the manufacturer’s instructions. This usually involves frequent vacuuming

Earth Weave is the gold standard among non-toxic carpeting. They simply make the very best stuff. Earth Weave’s natural, non-toxic carpeting is made in the United States from carefully selected European wool, hemp, cotton, natural latex, and jute.

Why are Vinyl Floors Becoming So Popular?

Selecting new flooring can be a difficult task.  You probably know exactly what you want, but sometimes your budget just won’t allow it. Carpet Flooring Centre we know how difficult it can be to find new flooring that fits in with your budget. This is why we recommend vinyl floors.  Vinyl floors are increasing in popularity, and for very good reasons.

Vinyl floors are very cost-effective.  They will fit with almost any budget. That means you can get a beautiful new floor without breaking the bank!

Vinyl floors come in an endless variety of colours and styles.  You can choose flooring that looks like tile or wood, or that has a pattern.  You can also find almost any colour or design, so you can find something that matches your current décor.

Compared to other types of flooring, vinyl floors provide a much more cushioned surface.  This is especially good for people with back, foot, or joint problems.

This type of flooring is so easy to clean and maintain.  It is water-resistant, so spills wipe up very easily.

Vinyl floors can be installed right over most subfloors.  This makes installation inexpensive. You also do not have to worry about spending a lot of time on demolition.

Vinyl floors are beautiful and look great in any home.

Vinyl flooring comes in a few different styles like vinyl click plank, vinyl click tile, and vinyl plank flooring.  These different options ensure that you can find the perfect style and look, so you will be completely satisfied with your new flooring.

This Design Mistake Could Lower The Resale Value Of Your Home

Whether you’re buying a new home or renovating your current one, if resale value is a concern, there’s absolutely one design mistake that turns off a large segment of potential buyers: wall-to-wall carpeting, especially throughout a home

While many designs come back in style (hello mid-century modern), carpeting an entire home isn’t likely to make a resurrection any time soon. “Even when it looks in good shape and the home is furnished, it almost never looks good and clean once that furniture is removed,”

While the hardwood flooring of previous generations didn’t come cheap, today’s hardwood alternatives are available in a range of prices and many are practically indistinguishable from solid wood. So, carpet has almost completely lost its cache. “I think flooring has become a big design feature and so the idea of covering up the floors is less popular as it’s such a selling feature,” the agent says. “There is a lack of flexibility in a wall-to-wall carpet, which doesn’t appeal to the modern buyer.”

that some buyers still prefer soft flooring for bedrooms. However, they usually avoid carpeting the entire room. “It’s far easier to redo or change the feeling in a room by purchasing a new rug! There’s a freedom to wood flooring,” she explains. “The vast majority of buyers plan to use a rug that stops a few inches shy of the wall.”

This is because many co-ops required a certain percentage of flooring in every unit to be carpeted. While these rules haven’t exactly been lifted, most of the time, unless there are noise complaints, they aren’t strictly enforced today.

Thinking of Buying A Carpet – Where do I Start?

These days there are many different types of carpets available which can often be overwhelming. With each different type having their own benefits, it’s hard to know where to begin. Carpets bring warmth and a touch of luxury to your home but can also be a very practical choice when choosing flooring.

Polypropylene carpets are becoming increasingly popular with their sales overtaking the more traditional style 80/20 wool twist carpets. Manmade carpets have improved greatly in quality over the years. Gone are the days where you risked getting a shock off the static from your manmade carpet! Polypropylene carpets are ideal in any area of your home as they are stain resistant and bleach cleanable and can deal with most things that everyday living can throw at them. They are great for busy households with children, pets and the occasional glass of wine!

They come in all different qualities and price ranges so you will always be able to find one suitable for your needs and budget – ranging from tough berber styles through to luxurious thick saxony styles which feel gorgeous in the bedroom.

Wool carpets still remain a popular choice, ranging from your 100% wool berbers to 80/20 wool twists. In recent years 50% wool and 50% manmade carpets have become increasingly popular, offering you the benefits of both types. Wool has traditionally always been a popular choice when choosing carpets. Wool is very hard wearing and stays looking good for a long time. Due to its natural oils in wool, wool carpets can clean up well too and is a luxurious choice for flooring in your home.

CARPET THINGS TO CONSIDER

WE WANT YOU TO BE ABLE TO MAKE A SMART PURCHASE.

Choosing the best carpet is about knowing the right combination of characteristics, aesthetics, performance, and budget to best meets the needs of your lifestyle. We want you to know all the important facts about carpet specifics and characteristics. The more you know, the better able you will be to make a smarter purchase decision.

UNDERSTANDING SEAMS AND BACKING WILL HELP YOU WITH YOUR DECISION.

Carpet is available in 12’, 13’ and 15’ widths. Unless the room to be carpeted is narrower than these widths, the carpet will be seamed. With looped or low-profile patterned carpets, you may have visible seams. The degree of their visibility depends on texture, color, lighting, and furniture placement.

DURABILITY IS A FUNCTION OF QUALITY.

Higher quality carpet will typically have greater pile density and tighter twist construction. This will result in better durability. Another consideration is that it is easier to replace or update a home decor with carpet compared to other hard surface products.

COLOR HAS A BIG IMPACT ON ANY ROOM.

Carpet covers a large area of any room, so it is important to keep some basic rules in mind when selecting your carpet. Once a carpet is installed it will often look lighter than the sample. Lighter color carpet will visually expand the size of the room, while darker carpet will create a more intimate feeling. Neutral colors are the best choice for frequent change of decorating scheme or if you are trying to incorporate a large amount of existing furniture. A neutral color is also a good idea if the home will be resold at any time.

CHECK YOUR WARRANTY FOR STAIN PROTECTION.

Stain protection is an important consideration in any carpet purchase. Carpet products come with different stain protection levels and warranties that help guard against stains. As you increase the quality of carpet, stain protection also typically increases, as does manufacturers’ warranty coverage.

What Equipment Do You Need To Be A Wedding Photographer

HOW TO NAIL YOUR WEDDING DAY PHOTOGRAPHY TIMELINE

A well considered wedding day photography timeline can make all the difference when the big day rolls around. With all the preparation that you will have put into finding and working with the best suppliers for your wedding day, it’s no small feat to plan out what happens when. In photographing weddings, I’ve found that there’s often a direct relationship between there being enough time for photographs and the day running smoothly and stress-free for all involved, not just the photographer. I don’t think that this is a coincidence!

In my old career, I used to run a lot of projects. I spent a lot of time advising people against bunching milestones together, trying to pack too much in, and not leaving any time for the unexpected. When I started shooting weddings, I noticed some of the exact same issues coming up. Naturally, I also saw many things go very well! Over time, I’ve come to understand what brides and grooms can do – with a little advance planning – to make their wedding days run like clockwork (and be even more awesome as a result).

When planning a wedding day, there’s a whole bunch of people to consider. Obviously, the guests have got to know where to go and when, the ceremony often has timings that are set in stone and all of the different suppliers will want to know when to start the music, serve the starters, and crack open the bubbly. But, at its most basic, there are the only three parts of any wedding day: before the ceremony, the ceremony itself and after the ceremony. Your wedding may have many different things going on compared to someone else’s. However, it will still fit into those three parts. When considering how your day is photographed, a few minor changes or tweaks to the timings can make all the difference – so that’s what we’ll be focusing on here.

BEFORE THE CEREMONY

A wedding day photography timeline always starts at the very beginning: getting ready! If there’s just one photographer in action, then they will be with the bride. A second photographer can be with the groom getting ready, and can get to the ceremony location a little earlier than the main photographer to start getting photos of people arriving.

PHOTOS TYPICALLY TAKEN BEFORE THE CEREMONY

Details of both the bride and groom

Candids of the bride and bridesmaids getting ready

Candids of the groom and groomsmen getting ready

Portraits of the bride

Portraits of the groom

Departing for the ceremony

THINGS TO KNOW ABOUT A FILM PHOTOGRAPHER

I travel all over the country from my home-base shooting special days for clients on film and I’ve spent years honing the craft. Film, as a medium in wedding photography, has made a resurgence in popularity in recent years for outdoor-centric couples, and has become a common option in the photography game.

It’s no surprise that more and more brides are starting to catch on to the differences between film wedding photographers vs digital wedding photographers (read more about why you should choose a film photographer here). Now that film shooters are an option for most clients – I wanted to make a point to aid those brides and grooms seeking a film wedding photographer be prepared before they sign on the dotted line.

In this article, I’ll help answer some frequently asked questions about film wedding photography, suggest questions that you should ask any film photographer you’re considering hiring for your wedding, and let you in on the important details you should know going into your search. Have you already read the below and decided you want to inquire about my own film photography for wedding days? I’d love to chat

Will film images look different than that of a digital shooter? Yes! Film images look different than digital images. Film photographs can retain more highlights, dynamic range, creamier image compression for backgrounds, a smoother blending of light and tone, more true-to-life color palette, a more appealing grain, and overall more aesthetically pleasing texture and controlled vibrancy.

How are these film images uploaded or edited? Once the photographs are taken on film rolls, they are given to a film lab who then processes them, and scans the wedding negatives into the computer at a high resolution. These images are then uploaded online and given to the photographer for final review. The photographer can edit images, and will delivery them in the exact same way (as High-Resolution, downloadable JPEG files) no matter whether images are taken on film or digital cameras

YOU DON’T LIKE POSED WEDDING PHOTOGRAPHY

You’re planning on having the most fun possible in one day. Your wedding is all about your favourite people, the food, and the music. You want photographs of people, not stuff. People having the best time. You want photographs that aren’t planned. Photographs to remind you of how it felt to be there. Real. Unposed. Informal. Fun.

isn’t posed, even if occasionally it looks posed. It’s about you being you and forgetting the camera is there. It’s about fun, and love, and having a bloody good laugh. It’s about real people doing real things.

Unposed. Real. Totally freaking epic pictures to relive forlikever how it felt to be there. That show the mavericks personalities in every shot. Confirm they had the best fun they’d ever had in one day and are champions at throwing a wedding to remember.

Things Your Wedding Photographer Wishes You Knew

A wedding is one of those rare occasions when you already have everything you need to create incredible, heartfelt pictures. You have the romance, the people, the killer outfits, the amazing backdrop — you just need the perfect person to capture it all. With so many wedding photographers to choose from, it’s important to pick someone who gets who you are as a couple and your wedding style. Lucky for you, we’ve got an inside source that is ready to tell you everything your wedding pro wishes they could

Be yourself, have fun, and pick a photographer you like as a person. So “have fun” might sound like a given, but a lot of the time, brides feel pressure to feel or look a certain way on their wedding day. Believe us when we say that you will always look your best when you are relaxed and happy — especially when you’re being photographed. “Make sure you feel comfortable with your photographer, and you have a good rapport. They will be there the whole day with you, and in some intimate moments,” says. “It’s as important you like the person behind the camera as much as you like their work. That way you can have more fun and take it all in!”

Give them all the deets. Make sure your photographer knows everything that’s important to you. This means your schedule, details, group photos, all of it. Knowing all of the details in advance means there’s nothing more to figure out, and lets them capture all the spontaneous memories that happen as they go. With a solid plan in place, your photographer will be there to capture it all so that you can enjoy your day.

Smile more than you think is cool. “I sometimes see brides who hold back on smiling because they don’t want to look fake in their wedding portraits,” explains. “Ironically, you can look even more awkward when you’re holding back rather than showing your genuine emotion and happiness.”

Awkward is charming. Real feelings and moments are timeless. Your big day will be filled with so much emotion — allow for things to be natural and imperfect instead of trying to constantly control how you look. says, “A good photographer will figure out the most flattering lenses and angles for you. It’s their job to worry about it, not yours!”

Things to Do Right Now to Book More Weddings

Lately, we’ve been getting a ton of emails from photographers who are starting to panic a little. It’s November. It’s cold outside. And it’s feeling pretty darn cold in their inboxes, too. Their inquiries have slowed down and all but stopped, and they’re just not sure if they’ll ever book another wedding again. EVER. And they want to know: is there anything they can do?

If you’ve been finding yourself in the same boat as these guys lately, here are ten things that you can do right now to help turn the tides:

Be thankful for the clients you already have. Tell them you’re thankful. Send them an email, write them a handwritten note, or send them a gift. Remind them (and yourself!) that they are the reason you get to chase your dream.

Pick one venue where you have done some of your best work and would want to shoot there again and again, and make your contact a sample album. Not next month or “at some point” (whenever that is), but today. Seriously, just do it already. Take an hour and design it. Upload the order. Pull the trigger and get it done.

While you’re at it, send some images to your vendors! If you use PASS or a similar program, or if you have a video business card, it’s only a matter of sending an email. It takes 30 seconds, but it makes a world of difference.

Pick that one vendor (planner, location, florist, etc.) who has sent you a lot of referrals or helped you get started and send them a gift — a nice one. They deserve it!

Go through your website with a machete and slash and burn. Get everything off there that is outdated, underwhelming, or just plain bad. If I were going to look at it with you in person and you would tell me that you’ve “gotten so much better since then,” then what is it still doing welcoming brand new clients to your website?

Find some other photographers to hang out with. Go to a meetup, host a lunch, or send out that intro email. Meet up and do headshots for each other. See if anyone is interested in sharing a Google calendar to refer each other (and give really good referrals when you do). There is strength in numbers. Plus, sometimes you just need someone who understands when you say “the client wants to do pictures at high noon on the beach.” Oy.

Make a “best of” folder on Facebook. Add all of your best (truly best, like 50 or less images) work from last year. Re-tag everyone that’s in it.

Re-write your “About Me” page. You know it needs it; I know it needs it. Make a video or write something that will make a potential client fall in love with you.

Run a November booking special. Everyone who books by the end of the month gets a complimentary engagement shoot or an extra hour of coverage. Or the first season of Downton Abbey. You choose.

Get your stuff together, put on your brave pants, and submit some weddings! Take your work to where the brides are. Two Bright Lights is an excellent resource for streamlining this process and taking the guesswork out of it if you need a good place to start.

The Pros And Cons Of Hiring An Home Renovation

Elements of a Kitchen That’ll Be Ready to Party When You Are

Dinner parties and in-person book club brunches may be the stuff of daydreams right now, but consider this mandated pause on hosting the perfect opportunity to get your kitchen in shape for its post-quarantine debut. Gathering with others will be at the top of the to-do list when social distancing rules relax, so now’s the time to make sure you, and your kitchen, are ready to rock.

To entertain even a small number of guests, or just your family, you need appliances that are true workhorses. A wide French-door refrigerator allows for easy storage of crudité trays, sheet cakes, and extra party snacks. A double oven lets you simultaneously roast and bake multiple dishes at different temperatures, while a five-burner stovetop ensures you have plenty of room to boil, sautée, and fry all at the same time.

There’s nothing worse than ending a fun night with a mountain of dirty dishes in the sink. A high-capacity, efficient dishwasher is every entertainer’s savior. If room allows, consider installing two dishwashers and two sinks, one for prep and one for clean-up.

Even if you have a formal dining room, chances are that guests will congregate in the kitchen, so incorporate seating for a designated gathering spot. Carve out a nook with an eat-in table, or add bar stools to a kitchen island or counter

Entertaining items like large serving dishes, punch bowls, and cake stands can be annoying to store. They take up a lot of space, often can’t be stacked, and wind up being in the way when not in use. The solution? Designate one cabinet or shelf as the “party pantry.”

Huge Mistakes to Avoid When Painting Kitchen Cabinets

Painted kitchen cabinets may look super simple on Pinterest – imagine, just a few coats of a new color and your kitchen will be spruced up in no time! In reality, painting kitchen cabinets is a project that definitely has many potential pitfalls.

To set you up for success, we’ve outlined some of the biggest blunders and outlined how to easily avoid. That way, you can tackle this big job with confidence. With our advice on how to paint kitchen cabinets you’ll end up with an updated kitchen you can’t wait to show off!

You have unrealistic expectations.

Painted cabinets look lovely, but they aren’t going to look totally smooth. “If the cabinets have a visible open grain, the grooves are going to show through the paint,”

You don’t allow yourself enough time.

“This isn’t a lazy Sunday project,” says, who, along with her husband, chronicled kitchen painting projects on her popular blog Young House Love. She says people often think it’s a weekend job, but it takes at least four to seven days when you build in the proper prep time (and snack breaks, of course)

You don’t clean the wood before painting.

“No matter how clean you think your kitchen is, you need to wipe everything down with a grease remover,” says. Otherwise, when you add a water-based paint to an oil-covered door, the paint won’t stick. He recommends a paint-prep degreaser called TSP, and a non-scratch delicate scrub sponge for stuck on spots.

Home Renovations Have the Highest Return on Investment

It’s sad but true: not every home renovation offers a great return on investment. In fact, most upgrades that you make around the house wind up costing hundreds or even thousands more than they’re worth. If you love the result, then those overpriced changes can be worth it. But if you have any intention of selling your house in the future, then you’ll want to choose renovations that make sense, cost-wise.

Garage door installation

The garage door might not be the first renovation you think to do when you’re channeling your inner Joanna Gaines, but it turns out that this particular replacement has one of the highest returns you can get. You’ll get back almost exactly as much as you spend. And if you get your new door for a discount? You might even make money on the project.

Manufactured stone veneer

Curb appeal is worth a lot of money to buyers. Some might not even stop to check out your open house if they don’t like how it looks from the outside. Putting in a stone exterior is a difficult and pricey upgrade, but adding a manufactured stone veneer costs much less and helps increase the value of your home.

Entry door replacement

First impressions matter – that’s why a solid, attractive steel entry door is worth the cost. You can get an expensive-looking door installed for cheap and then recoup almost all the money you spent buying it.

Wood deck addition

Homebuyers are almost always looking for space to entertain and that includes outdoor areas. A deck isn’t cheap, but it will increase the value of your home enough to almost cover that cost.

Benefits of Renovating Your Home!

Whether you are looking to transform your house to put it on the market, or simply want to enhance your living environment and the aesthetic of the space where you spend the majority of your time, a partial or complete home renovation boasts an array of short term and long term benefits for homeowners.

Increases Property Value

From a fresh coat of paint to new fixtures and appliance upgrades, renovating for a profit is certainly doable with the help of industry professionals. From understanding colour palettes and timeless designs, there’s a number of simple home improvements that can drastically improve the value of one’s property by modernizing the interior, refreshing the exterior or simply opening up a previously small and lifeless space. 

Enhances Energy Efficiency & Reduces Utility Bills

When people think of home renovation, they generally associate it with lavish and visible improvements to a home, including a fresh paint job, complete layout redesign and new colour scheme. However, one hugely beneficial part of renovating your home is upgrading old fixtures and plumbing to modern and more energy efficient models, which effectively help to lower your utility bills. Simply upgrading your plumbing and fixtures alone can make a world of difference, not to mention even greater long term savings should you choose to opt for the green, eco-friendly options. Despite the initial expense, it’ll pay off in the long run!

Maximize the Space

Houses can get cramped over time as families grow, resulting in the space looking small, outdated and impractical.

Helps to Avoid the Cost and Stress of Moving

When you get tired of a home, your first instinct is to pack up and move – right? With a home renovation service, you get to recreate the space as extensively or minimally as you want to design your dream layout and design, allowing you to save the hundreds of thousands it would’ve cost you to relocate to a new home. Aside from the obvious prices associated with purchasing a new property, there’s also plenty of additional costs, such as agent’s commission, legal fees and relocation fees

Things I Wish I Had Done Differently: Home Renovation Edition

I may design homes for a living, but that does not mean I’m immunized against making mistakes.  Actually, I make the most mistakes when working on my own homes- mostly because I’m overwhelmed by options and ideas and make decisions on the fly instead of with careful consideration, as I do when working for someone else. “Ehhh, that’ll fit- we don’t need to measure” is a phrase that now gives me chills.

This weekend I began cataloguing some of the things I wish I had done differently in my renovations.  Most of them are from our first phase of the renovation right after buying our house, I think I had learned a lot by the second phase (still obsessed with my master suite).  But in life some of the best lessons come from examining your failures as to not repeat them again!

MY KITCHEN FAUCET

From the beginning wanted a pull down spray faucet with a single lever instead of the separate hot and cold handles.  I, of course, love the look of widespread handles and went that direction- beauty over function, a common designer downfall. Now with a baby (and after a couple years of use), I fear I maybe should have listened. The issue still stands that finding an attractive single lever, pull down spray faucet is very hard- but there are some good options here, here and here.

CHROME VS. BRASS

Apparently I just blew it on the faucet. 🙂  I was scared to go with brass for my kitchen faucet and now I wish I had been ballsier and listened to my inner voice and not the other people who thought it was crazy to do a brass faucet. I’m glad I went for it in my master bath, because daaaaaammmnnnn do I love it. But trying to find a single lever antique brass faucet with a pull down spray is like trying to locate and capture Nessie.

MY BACKSPLASH

I still love my white subway with grey grout but I wish I had done two things- 1) run the tile all the way to the ceiling around the doorway to the mudroom and around the window above the sink.  I also forgot to specify the spacing I wanted (assuming things makes an ass of–well, just me) and they did it way tighter than I had wanted. I wish I had said something and had them redo it instead of just feeling too guilty to ask them to make it right.

Tax Planning Of The Year

What is tax planning and types?

Tax planning is an activity that responsible tax paying individuals, businesses or organisations undertake to maximise the use of available deductions, exclusions, rebates and allowances to reduce tax liability. In other words, it is a legal way to reduce your tax liability by leveraging approved government tax saving investments and related options.  Tax planning thus keeps individuals and organisations control their finances more efficiently and achieve their financial goals with greater ease.

Objectives of Tax Planning

Tax planning ensures savings of taxes while conforming with the legal obligations and requirements set by the Income Tax Act, 1961. The following are the key objectives of tax planning in India:

  • Reducing Tax Liability: Possibly the most obvious objective of tax planning is to help an individual or business reduce their tax liability by taking advantage of available tax deductions and benefit options.
  • Strengthening Investment Portfolio: A key part of tax planning for individuals and corporations is related to investing in various notified instruments and asset classes that offer tax exemptions under the Income Tax Act 1961. Tax planning allows them to find different avenues where they can invest their money and get great returns.
  • Facilitate Economic Growth: When white money circulates in the market, it benefits the economy of the country and its citizens. Tax planning ensures that citizens grow economically and white money circulates in the market.

Types of Tax Planning

There are three main types of tax planning:

  • Permissive Tax Planning: This is one of the most common types of tax planning since it is made exactly as per the provision of the Income Tax Act.
  • Purposive Tax Planning: When a taxpayer wants to plan taxes with a particular financial goal in mind, it is known as purposive tax planning.
  • Short-range/Long-range Tax Planning: If a taxpayer plans investments and savings based on the exemptions, benefits, allowances and deductions laid out in the tax laws, with a short-range or long-range goal in mind, it is known as short-range or long-range tax planning. In India tax-saving investments are available with a multi-year lock-in period during which redemption is not allowed. Currently ELSS (equity linked savings schemes) have the shortest lock-in period of 3 years.

Benefits of Tax Planning

Tax planning should not be taken lightly. It can offer plenty of benefits to an income tax assessee including the following:

  • Ensure Good Cash Flow: Tax planning helps you find ways to diversify your investments and generating savings in a sustainable manner that ensures good cash flow round the year. This in essence ensures that you invest and also cover other key expenses without breaking the bank.
  • Cushion against Uncertainties: No matter how good your life is right now, uncertainties can never be ruled out. By planning your finances, you can create a cushion against uncertainties and live your life stress-free. This is of course true for both tax planning investments as well as non-tax planning investments too.
  • Take Advantage of Tax Savings Allowed Under the Income Tax Act: One of the main reasons to recommend tax planning with short/long term goals is that it helps you take advantage of the various deductions, allowances, rebates, etc. offered under the various sections of the Income Tax Act.

Tips assist in saving tax on income

Medical bills

One can hold all the medical receipts of their medical expenses. To use them for saving tax year end. An amount up to Rs 15000 is non-taxable on medical expenses for them and their dependent family members.

House rent allowance

Can claim House Rent Allowance to save tax on one’s house rent. Though, this is relevant only when they are staying in rented accommodation.

Equity mutual funds

Investment in equity mutual funds is a vast approach to make profits 100% non-taxable. Still, it is prudent not to trade one equity shares before a period of 1 year as anything less than 12 months may acquire tax on profits.

Make donation

It is a great way to save tax on income. Section 80G of the Income Tax Act allows a person to claim deductions up to a particularised limit. For donations made to charitable organizations or NGOs. This choice will save taxes as well as bring some way.

Buying of health policies

Premium paid on health insurance policies is recognised as a deduction from total income. In reference to the to Section 80D of the Income Tax Act. Deduction up to Rs 15,000 is possible for insurance of self, spouse and dependent children. This is 1 of the greatest options and can be an element of tax planning.

Why Every Person Needs Tax Planning ?

Tax Planning is resorted to maximize the cash inflow and minimize the cash outflow. Since Tax is kind of cast, the reduction of cost shall increase the profitability. Every prudence person, to maximize the Return, shall increase the profits by resorting to a tool known as a Tax Planning.

How is Tool of Tax Planning Exercised ?

Tax Planning should be done by keeping in mine following factors :

  • The Planning should be done before the accrual of income. Any planning done after the accrual income is known as Application of Income an it may lead to a conclusion of that there is a fraud.
  • Tax Planning should be resorted at the source of income.
  • The Choice of an organization, i.e. Taxable Entity. Business may be done through a Proprietorship concern or Firm or through a Company.
  • The choice of location of business , undertaking, or division also play a very important role.
  • Residential Status of a person. Therefore, a person should arranged his stay in India such a way that he is treated as NR in India.
  • Choice to Buy or Lease the Assets. Where the assets are bought, depreciation is allowed and when asset is leased, lease rental is allowed as deduction.
  • Capital Structure decision also plays a major role. Mixture of debt and equity fund should be balanced, to maximize the return on capital and minimize the tax liability. Interest on debt is allowed as deduction whereas dividend on equity fund is not allowed as deduction

Overlooked Details When Hiring A Family Law Attorney

What is the difference between juvenile court and family court?

The legal system is complex, and often, it can be hard to understand each individual branch of such a massive entity. Two of the most commonly confused courts are juvenile and family, and many people do not know the difference between the two. They are similar in many ways: for example, they are both key parts of the court system. They have many striking differences as well. An attorney who handles family law is a specialist in his field; and one who assists minors in juvenile court works with a completely different set of rules.

Family Court

Family courts have a limited amount of jurisdiction in terms of law, but they do handle virtually all cases related to the family unit. Cases frequently tried in family court include:

  • Divorce
  • Guardianship
  • Domestic violence
  • Child custody
  • Parental competence

Family courts most often handle child custody and divorce cases. Depending on the nature of the situation, some cases may be tried in formal proceedings instead of courtrooms.

In family court, attorneys, social workers, and members of the community may participate along with the family members involved. The court strives to resolve differences, and in many situations, mediation will be utilized instead of litigation. Family courts are also instrumental in providing families with the resources they need to solve their problems.

Juvenile Court

Unlike family court, juvenile court deals primarily with minors who have been accused of engaging in criminal behavior. Juvenile courts, unlike adult criminal courts, only utilize civil proceedings. This means that instead of an actual crime, juveniles can only be charged with delinquent acts. Juveniles who are accused of crimes are brought into court when a probation officer or prosecutor files a civil claim. Juvenile courts strive to act in the best interest of the minors they are entrusted with.

In general, any individual under the age of 18 may be tried in juvenile court. Periodically, juveniles accused of serious crimes may be tried in adult courts. However, the vast majority of juvenile cases involve petty crimes such as theft, disorderly conduct, drug abuse, and simple assault. Juvenile court is usually less formal than adult criminal court.

Differences between adult and juvenile criminal court:

1. COMPLAINT VS. PETITION

In adult court the defendant is charged by using a document called a “complaint”, whereas in juvenile court, the child is charged with a document called a “Petition”

2. NO JURIES

In most jurisdictions, including Minnesota, when juvenile cases go to trial, the child is not afforded a jury trial like in adult court. Rather, one judge is the finder of fact at a trial. While difference makes for shorter trials since the lawyers do not have to spend days picking a jury, the juvenile and his/her lawyer do not get the benefit of multiple finders of fact. The child is still considered innocent until proven guilty, the prosecutor only has to convince one person of guilty beyond a reasonable doubt, verses an entire jury.

3. CONVICTION VS. ADJUDICATED DELINQUENT

In adult court if the defendant is found guilty, they are “convicted”, whereas in juvenile court the child is “adjudicated delinquent”.

4. SENTENCE VS. DISPOSITION

After a defendant is found guilty in a criminal case he/she will have a sentencing to determine punishment, whereas in juvenile court there is a “disposition” to determine what should happen to the juvenile.

5. WHERE THE “DISPOSITION” IS HELD

In adult court the defendant has all of his/her hearings in the county in which they have been charged, which is generally the county in which the offense took place. In juvenile cases, the case is charged in the county where the offense took place and that is where the case will be tried or a plea of guilty will be entered. However, if the child resides in a different county then the “disposition” of the case is generally moved to the county of residence.

6. REHABILITATION VS. PUNISHMENT

The system in juvenile court is much more focused on the best interests of the child, and trying to make sure they are rehabilitated prior to becoming an adult. There is much more emphasis on treatment, therapy, and education rather than just punishment.

Probate  Court And Dependency Court Termination Of Parental Rights:

Parental rights may be terminated where:

  • 1 or both parents do not have legal custody
  • Child out of parent’s custody for 2 years
  • Child would benefit from adoption by guardian
  • The “unfitness” standard is falling out of favor with the courts and is being replaced with the “best interests of the child” standard under the Family Code.
  • Recent case has held that only some showing of unfitness is necessary and that can be a PAST unfitness.  Held unfitness is not as appropriate test  “best interests of the child” because “unfitness”
  • Does not account for child’s interest in stability and permanency
  • Does not account for guardian’s substantial interest
  • Due process requires a finding of unfitness and DETRIMENT (in both Probate and Juvenile courts) by clear and convincing evidence before parental rights may be terminated.
  • At the Juvenile Court’s dispositional hearing, a finding that there exists a SUBSTANTIAL danger to the children unless removed from offending parent – is a finding of DETRIMENT.
  • Thus, a non-offending parent who has never been found to be unfit by the Ct may NOT have his/her parental rights terminated in Dependency Proceedings.  Example:  Father who was homeless and so didn’t ask for child, was not unfit nor was he a detriment to the child.

What are Some Methods Of Rehabilitating Juvenile Offenders?

Juveniles may be detained in a juvenile facility as part of the disposition of their case. They may also be required to perform community service and complete parole.

The focus with juveniles is to rehabilitate them and reintegrate them into their communities in a positive way.  Families are involved in a juvenile’s case. Parents may be required to make restitution, or pay fines, for their child’s offenses.

Under the CYPA, the Youth Courts essentially deal with three types of cases:

  • Cases involving youths who commit offences (Youth Arrest cases);
  • Cases involving youths who are in need of guidance (Family Guidance cases); and
  • Cases involving the protection of children (Child Protection cases).

Under the framework of the Youth Courts, court processes have been strengthened and new and better practices have been put in place to provide for more effective early intervention measures for these cases.

Local Moving For Your Relocation Needs

Moving Services

Help Moving / Hauling

Need something hauled away or help in your home as part of a move?

How it works

Describe Your Task

Tell us what you need done, when and where it works for you.

Choose Your Tasker

Browse trusted Taskers by skills, reviews, and price. Chat with them to confirm details.

Get It Done

Your Tasker arrives and gets the job done. Pay securely and leave a review

Packing Services

Leave the folding, boxing, and organizing to Taskers. Prepare for a stress-free move with packing services from organized and efficient

The most challenging part of moving is packing. Experienced Taskers can help. It’s scary thinking about a kitchen full of fragile dishes or a flat-screen before you pack. What kind of boxes do you need? Should you stack plates or stand them on their side?

Experienced Taskers know how to pack difficult items and what boxes and supplies they need. Taskers have experience packing items of all sizes and shapes. For instance, they will secure your washing machine’s drum before transport, and pack your plates in boxes with vertical slots.

Moving Company

Whether you’re moving from a high-rise in Belltown, or a bungalow on Capitol Hill, we’ve been there. movers are adept at navigating all types of apartments, condos, and homes on the streets and ferry ways. even move you inside the same building.

Unlike the van lines we don’t subcontract services to move your stuff.  When you choose for a long distance move, have the capacity so that your items are only handled by employees start to finish.

With multiple warehouses across footprint can meet your long or short term storage needs.  When you store your belongings with inventory, label, and store everything ourselves in self-contained crates that can be accessed only by staff.

Packing and Moving Boxes

Moving can be stressful, so leave the hard work! come the day before your move and pack everything for you.  When you hire to pack your valuable belongings there is the added guarantee that your items will arrive safe and sound at the other end.

which makes stand apart from the rest. movers are an exceptionally tight-knit team with decades of service between them, showing their true dedication to the company. embody core principals of a professional workforce with skill, intellect, and integrity.

Local and Long Distance Movers Serving

As a professional moving company, Good Movers offers every level of moving services. Residential and commercial moving packages are only a few of the services provide. In addition, have storage facilities, packing and unpacking services, and debris / junk removal services.

Residential Moving

residential moving services help give homeowners a peace of mind that their belongings will be safely transported to their new home by professional movers who have been thoroughly vetted and trained.

When you’re looking for long distance moving companies that will transport your life across the country, the Good you’ve been waiting for. are prepared to move all types of belongs, such as:

Antiques

Delicate electronics

Household items

Furniture

Commercial Moving

Good Movers provides moving services for all your company’s needs, too. can move entire offices or just one employee to a new location. Office moves can be complicated with electronics, bulky furniture, and business hours to consider. Good Movers will work around your schedule and bring all the supplies and equipment need to move your equipment, electronics and furniture safely.

Storage Options

understand that not every move is always perfectly coordinated. Sometimes you need to be out of your old home before the new one is ready. If you need somewhere to store your items in the meantime, Good Movers offers storage facilities and warehousing.

MOVING

MOVING BOXES & SUPPLIES

offers a wide selection of competitively priced moving boxes and packing supplies including tape, packing paper, markers, paper pads, bubble wrap, and stretch wrap (please try to refrain from popping bubbles until your move is complete!).

Free local box delivery is available and we’ll even give you a full refund for any boxes you don’t use (or keep them and construct a totally awesome fort for your kids!).

STANDARD MOVING BOXES

1.5 cubic foot moving box: The smallest box sold, it’s often referred to as the book or record box; best used for small heavy objects like books, records, cans, jars of food, utensils, flatware, shoes, etc.

3 cubic foot moving box: Referred to as the lamp or lampshade box; frequently used interchangeably with the 1.5 cubic foot box

4.5 cubic foot moving box: As the box gets larger, use for lighter objects such as pillows, bedding and stuffed animals

6 cubic foot box: Use for light objects; if you pack heavy items in this box it will be difficult to move

Picture or mirror moving box

A four-piece box that can come in large or small sizes (small shown); can be customized by telescoping in and out; use crumpled packing paper in the corners to add cushion and make sure to wrap your mirror or picture with bubble wrap before placing it in the box

Wardrobe moving boxes

Allows clothes to be transported on hangers; includes a metal bar along top of box to hang clothing

Boxes for moving dishes

Also called a barrel, dish barrel or dish box; it’s the strongest box available; pack fragile, breakable items such as china; usually used for kitchen items

Dish pack inserts

Cardboard that goes inside the dish pack boxes to form individual cells for fragile items; inserts adjustable; extra cardboard piece included to be used as springboard to cushion

PACKING SUPPLIES

Packing paper/plain newsprint – used to wrap everyday items to prevent scratching; when crunched up it can be used as cushioning.

Tissue paper – softer than newsprint, used for wrapping very delicate items; also provides cushioning and fills in small spaces when packing fragile figurines and china.

Bubble wrap – plastic packing material made up of hundreds of tiny “air cushions” or bubbles used to over-wrap small, delicate items after they are wrapped in tissue; also helpful when wrapping larger fragile items such as lamps and pictures.

Pink anti-static bubble wrap – used to wrap electronics including stereos and computers. It is similar to traditional bubble wrap but does not cause static electricity. If traditional bubble wrap is used to pack these items, a static electric charge could be created, damaging the item.

Packing tape/sealing tape – plastic tape, 1.5 inches (3.81 cm) to 2 inches (5.08 cm) wide; best for packing, test to see if it ruins finish before taping up drawers and canisters.

Permanent marker – used to label boxes with contents and destination in new location; mark boxes “fragile” and “this side up” when appropriate.

Re-sealable plastic bags – used for nuts and bolts as you disassemble items, tape bag to the disassembled item.

Moving and Storage – Respected, Professional, Trusted

Every move should be well planned, hassle free and smooth. You can count on Moving and Storage to provide just that! will exceed your expectations

The Best Packing and Moving Companies Ever with MOVING

If you are looking for an efficient moving and storage company, then are ready to tell you about one of them that will never leave you unsatisfied. Their working experience has proved that every move can be easily operated on the best conditions. If you choose this enterprise to deal with, you will forget about any problems connected with packing, storage, and moving.

You are never going to regret your choice if you decide to deal with this company. It is considered to be one of the best packing and moving companies. The matter is that they are ready to provide you with the following services:

Short-distance and long-distance moving.

Packing things of any size.

Senior moving.

Storage of your property.

Commercial moving.

As you can conclude, there are many useful things they can do for you. And this is not even the most important information for you to be aware of. Their work is highly effective due to the following factors:

It’s easy to find them on the Net, you can do it very quickly and from anywhere you currently are (it’s going to be enough to just google the phrase “moving and storage companies near me” and you will be facing the company we are describing).

They have a website where you can get acquainted with all the information that may interest you (the prices, the services provided, clients’ reviews, FAQ, and the locations they work with in the US).

There is a special application form given on the website that allows you to make a request fast and whenever you would like (both businesses and individuals can deal with this company). In this form, you have to fill in your first and last name, e-mail, phone number, and describe why you are making this particular request.

Very convenient working hours that make dealing with the company extremely comfortable for you. If you request on the website, it’s going to be processed quickly and efficiently.

Factors Prospective Buyers Consider While Evaluating Residential Painting In The Market

Common Problems With Acrylic Paint

Do you know how to revive old acrylic paint? Do you know when acrylic paint goes bad? If you’re new to the medium, you might be unsure how to handle some common acrylic paint problems. This acrylic paint guide will sort through some common complaints and give you some tips and tricks so that you can get back to painting.

The Paint May Have Gone Bad

Sometimes acrylic paint will dry out or separate in the tube. This malfunction doesn’t necessarily mean the acrylics have gone bad to the point where it’s no longer usable. Temperature changes can change the consistency of the paint, but acrylic paint usually becomes unusable due to mold growth.

The easiest way to determine if acrylic paint has gone bad is to smell it. Expired acrylic paint will tend to have a sour, aged smell that could be the result of excess moisture where the paint was stored. The shelf life of acrylic paint is anywhere from 2 to 5 years if the tube has been opened and upwards of 10+ years if the container is sealed.

What to Do With Old Paint

Some people decide to use old acrylic paint. However, if the acrylic paint has developed a pungent smell similar to spoiled milk, your best bet is to toss the paint and start over.

The Paint Has Dried Up

Acrylic paint has dried up when the paint is stiff, thick, lumpy, and won’t come out of the tube easily.

How to Fix Lumpy Paint

Usually, you can revive the lumpy acrylic paint if you can still get the paint out the tube. Since acrylics are water-based, you can add water and mix it into the paint using a palette knife until you develop a better consistency. Be sure not to mix in too much water, which could compromise the paint coverage and color. Too much water could also cause your paint to lift off the canvas once it’s dried.

Also, water becomes ineffective if the acrylic paint is rock hard. In this case, you can try to rework the paint with a clear acrylic base. To prevent the paint from drying in the first place,

The Paint Has Separated in the Tube

If you squeeze acrylic paint, and you find a tube of thick paint surrounded by a puddle of almost-clear liquid, then the paint has separated. In this instance, the pigment and binder are no longer adequately mixed. This paint separation is not necessarily something you’ve caused; it could be due to a manufacturer error or cheap paint.

How to Revive Separated Acrylic Paint

You can revive separated acrylic paint by mixing the pigment and binder back together with a palette knife. You could also return the paint to the store for a replacement.

The Paint Dries Too Fast

Most acrylic paint is designed to dry rapidly. However, sometimes the acrylic paint dries on the palette before you’ve had a chance to get it on the canvas.

How to Prolong Acrylic Paint Dry Time

Try to eliminate any drafts where you’re painting by closing a window or turning off a fan. If you are painting outside on a windy day or hot, consider going inside. Also, keep a spray bottle on hand and gently mist down the canvas and palette every so often to keep things moist longer. Some people also add paint retarder to their paint. However, make sure you don’t use too much or your paint might never dry.

Tips for Keeping Water-based Paint Thin

Avoid Leaving the Paint Can Open

One of the easiest ways to avoid the thickening of your water-based paint is to simply close the lid on the can when you finish pouring paint into a bucket or roller pan. Leaving the lid off of the paint can too long does allow moisture to evaporate from the paint, which will, in turn, make it thicker. So, as soon as you pour your paint, close the paint can.

Tip: Also, a slight covering of water on the surface of the paint is great for keeping the paint from thickening too much as you let it sit. Pour a small amount of water very slowly on top of the paint in the can. If you pour it in too fast, it will just mix with the paint.

Keep Stirring

If you’ve been unable to prevent your paint from getting thick, it will take some work to make it usable again. Fortunately, it’s not hard work.

When allowed to sit for a long time, latex paint will decant, with the heavier particles settling to the bottom. Before trying to thin the paint, stir, stir, and then stir some more. The more you stir your water-based paint, the smoother it will become. If you have a drill, consider purchasing a paint mixer extension to make the process easier and more efficient. The electric drill stirring rod is very sharp. Insert or remove the stirring attachment with the electric drill unplugged.

When stirring your paint, keep in mind that stirring the paint for only a minute or so usually won’t mix the paint well. If you’re stirring the paint by hand, stir the paint continuously for at least five or 10 minutes.

Tip: Also, when using more than one gallon of custom color, you should pour the paint back and forth repeatedly to mix the paints. This is called ‘boxing’ the paint and it will make your color more consistent between cans since custom colors are known to vary slightly with each mix.

Use Water to Thin Water-Based Paint

If stirring isn’t enough and you do need to add liquid to your water-based paint to thin it out, try using water before adding anything else.

Add an ounce or two of water to the can and then thoroughly stir. Continue to add water in small increments until the desired consistency is achieved. If you add too much water at the start, you will find that a lot of time will be needed to thoroughly mix the paint, so remember, add a little, then stir a little. Continue the process until the paint consistency is just right.

Can you wait too long between coats of paint?

Yes you can wait to long, if you leave it for too long the paint can get weathered when painting outside and the paint can breakdown. it is advised to wait no more then a month between coats at a max. Because if you leave it any longer it may deteriorate. Exterior surfaces are the most vulnerable in this case. But another downside to doing so, is that you may need to clean the surfaces and it implies more work in preparation before apply another coat. So It is a good idea to wait for the required time for your type of paint, being 1 to 2 hours or up to 24 to 48 hours depending on the paint and then applying your finish coat to get the job done.

Safety

Since oil-based paints can emit toxic fumes, you should always wear a face mask when you’re working with them as well as safety goggles to protect your eyes when spraying the paint.

The environment you’re working in should also factor in your safety considerations. If you are working in a tight, enclosed space, the face mask alone may not cut it, so you may need a respirator or ventilator to avoid fumes and maintain good airflow.

How to Correct Painting Mistakes

Your best friend when it comes to painting out your mistakes is a tube of titanium white. This extremely opaque, warm white will cover any color, even blacks, and other deep pigments when applied in a few thin coats.

Many artists make the mistake of adding a single coat of titanium white, then continuing on with their painting. This may cause any new pigments you apply to be tinted by the paint under your cover-up, and the colors will not be as true as you wish them to be.

You should apply at least two thin coats of titanium white, and the second coat should be applied only after the first is dry. This will give you a clean, white base to begin painting on after it has dried.