Steps To Recondition An Engine Rebuilding
How to break in a rebuilt engine
The two most commonly used methods to break in a rebuilt engine are dynamometer or load bank testing. However, these methods of engine testing aren’t always possible. If a rebuilt engine isn’t broken in correctly issues can arise including high oil consumption, excessive smoking and overall poor engine performance. This blog article looks at how to break in a rebuilt engine without the use of a dynamometer or load bank…
Why should you break in a rebuilt engine?
The process of breaking in an engine involves forcing rings and cylinder bores to conform to each other, sealing the combustion gasses within the cylinders. Unfortunately, idling the engine for a period of time will not create the pressures needed. Without serious force, piston rings may not seal properly – resulting in poor oil control and diminished engine performance overall.
Dangers of not breaking in a rebuilt engine
Improper or inadequate breaking in of rebuilt engines causes what is known as ‘glazing’, which prevents piston rings from ever sealing correctly. Glazing refers to how hard oil and fuel deposits collect on the cylinder walls of an engine. Once this happens, the only way to rectify the issue is to dismantle the entire engine again and break it in correctly.
Just rebuilt an engine? Here’s how to break it in:
Apply Make-Shift Loads
Most engine rebuilders agree that to correctly seal the piston rings, you need to focus on getting around 75% of full load on the rebuilt engine for a few hours – keeping idle time to a minimum. Ways of breaking in vehicular engines include:
- Attach a heavy trailer, find a long steep hill, and drive up it once or twice.
- Drive up to the speed limit as fast as you can then, while still in gear, release the throttle and let the vehicle coast to a complete stop.
Utilise Break-In Powders
They might be a little old-school, but many engine rebuilders still swear by them! We’re talking about break-in powders, like Caterpillar’s 7F5225 powder. Here’s how to correctly utilise a break-in powder when breaking in a rebuilt engine:
- Reassemble and start the engine,
- Loosen air cleaner on each bank of cylinders (leaving a gap between flange and inlet manifold),
- Run engine at 800RPM and allow powder to be sucked slowly through gap (1.25 teaspoons per cylinder)
- Tighten air cleaner, idle engine for 30 minutes, and it should be ready for service.
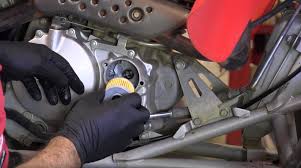
How long do I keep an engine running after a rebuild?
Used to run them at fast idle for about 1/2 hour with a cheaper oil and then drain that out and put in the factory spec oil.
Then my break-in routine was to rev the engine to only about 4000, and then release the gas and let the engine brake the car down to a slow speed, then once again up to 4000 rpm, and repeat this a number of times.
Always vary the speed during the first few hundred miles thereafter—don’t use cruise control at first, and you don’t have to be too gentle with the engine either. Just stay out of the redline.
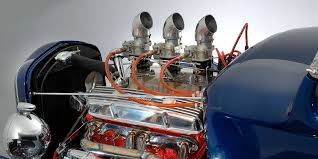
Engine Break-In How To | Do It Right The First Time!
So you’ve spent a good amount of money building up you motor. You’ve carefully planned the entire build, from bearings to pistons, and crank to cams. No corners were cut in your pursuit of power, and you’ve got the receipts to prove it. But before you turn the key for the first time, there are a few important things to check, and neglecting them could be the worst decision you’ve ever made. Below we’ll go over the process of the proper engine break-in procedure.
- Safety First
- Priming The Engine
- Proper RPM’s
- Run Times
- Oil Type and Oil Change Intervals
Safety First
Thoroughly inspect all moving parts you’ve touched during the removal of your old engine or installation of the new mill. Check coolant, gear oil (or ATF), and engine break-in oil for proper levels. Lastly, before you fire it up for the first time, ensure the parking brake is set, and the transmission is in neutral. It’s also a good idea to chock the wheels.
Priming the Engine
Priming the engine is as easy as removing the crankshaft position sensor and cranking the engine until the oil light shuts off. It’s also a good idea to remove the fuel pump fuse. if you don’t have an oil pressure light on your dash, purchase an aftermarket gauge so you can keep an eye on oil pressure. Ensure you’re making pressure while turning the engine with the CPS unplugged. If all is good, connect the CPS or Fuel Pump Fuse, and start the car.
Proper RPM’s and Engine Run Times
After the first start, let the engine run for 20 minutes at varying speeds between 2000 and 3000rpm. It is critical to vary the RPM’s for proper camshaft break-in and to ensure the piston rings and moving components are properly broke-in. After the first 20 minutes, inspect for oil, coolant, or fuel leaks. If all is good, take it on the road. Driving periods vary based on application, but no less than 30 miles is recommended. Head off to a low traffic area, where you can do long pulls at low load followed by engine braking back down to idle. This process is called “Vacuum Pulls” and helps seat the piston rings. Repeat no more than 50 miles and avoid open throttle and full boost scenarios. Watch your gauges like a hawk, and make any adjustments to your AFR’s at this point.
After the initial break in period, you’ll change your oil and then repeat the process until you’ve hit the 500 mile mark. After this, your engine will be fully broke-in.
Oil Change Intervals
Initial start up requires SAE 30 break-in oil and a new oil filter. If you dont have any SAE 30, conventional oil is fine. This oil will be in the engine from initial startup to the 50 mile mark. Change the oil at 50 miles, and again fill with SAE30 break-in oil or conventional oil type and run using the process outlined about for another 450 miles. At 500 miles, you’ll change the oil once again with conventional oil and a new filter. The last oil change you’ll make before completing the engine break-in procedure will be at 1500 miles, at which point will be conventional or synthetic oil and a new filter. From here on out, the typical 3000 mile interval is recommended.
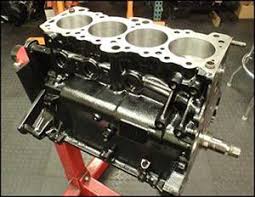
How to Break In a Rebuilt Motorcycle or ATV Engine
If you spent hours rebuilding the engine in your motorcycle, ATV or side-by-side, the last thing you want to do is ruin all that hard work by failing to properly break in the motor.
The steps to follow for breaking in a rebuilt engine once it’s running again will vary slightly depending on the type of engine. For example, the steps for a high-performance street bike requiring high RPM for peak performance differ from a more sedate side-by-side that relies on lower RPM torque to get the job done. However, these steps more or less apply to all rebuilt engines.
Supplies Needed: Breaking In a New Engine
- Oil
- Oil filters
Adding Conventional Motor Oil
Fill the motor with a conventional engine oil, not a synthetic. Synthetic and semi-synthetic oils are too slippery and slick, which prevents the new piston rings and cylinder bores from seating properly. During the first few minutes of running, the piston rings and the walls of the cylinders need a small amount of friction so they can wear fractionally, and so their surfaces can conform to one another to form an effective seal. It’s this seal that gives an engine good compression, and it’s that compression that really adds to the performance of your rebuilt engine.
Static Engine Run to Operating Temperature
The first time you restart the motor after a rebuild should be a static run. Wheel the machine outside or make sure you’re in a well-ventilated space. Then, start the engine and bring it up to operating temperature while gently varying the throttle between idle and 50% open. Don’t go over 50% throttle at this point. Once the engine has warmed up, give it a thorough inspection for any leaks; listen for any odd noises; and look for any other mechanical issues such as excessive vibrations. Shut off the engine and let it fully cool down.
20-Minute Active Engine Run
An engine break-in happens mostly during the first 20 minutes of running after the rebuild. If you have access to a dyno, strap the vehicle down and vary the load on the engine between idle and 70% throttle. Otherwise, take the vehicle for a short ride to put a load on the engine. Vary the throttle between idle and 70% to push it a little harder than you did in the static test. Find somewhere without any traffic where you can safely run the vehicle while varying your speed to break in the engine.
Assuming everything goes well and there are no mechanical issues, start varying the throttle between 50% to 80% to further increase the load on the engine. Next, run the vehicle as you would in normal operating conditions. If it’s a competition motorcycle, run it like you would at the track. If it’s a UTV, run it like you would when hauling stuff.
First Oil and Oil Filter Change
After the initial 20-minute active run, give the motor another thorough inspection, and then change the oil and the oil filter. All the tiny pieces of metal that were sloughed off the piston rings, cylinder bores, bearings, etc. as they bedded-in are all now suspended in the oil and flowing around the engine. Drain out the oil and remove the oil filter to get rid of all that debris.
Install a new oil filter and refill the engine with oil. Once again, use conventional oil because the parts within the engine are still bedding themselves in and synthetic oil will hinder that process.
Normal Engine Running
This step will vary depending on the type of engine and how it will be used. If the engine is in a performance street bike, motocross bike, ATV or UTV, run it for 3-4 hours as hard and fast as you normally would. If the engine is in a cruiser bike, run it for 400-500 miles exactly as you normally would, regardless of how long it takes. If the engine is in an ATV or UTV, run it for a weekend (at least 6 hours) just as you normally would. Don’t baby the engine; run it as hard as you will every day thereafter.
Second Oil and Oil Filter Change
Once the engine has completed the normal running cycle, go ahead and change the oil and the oil filter again. By now the engine should have finished breaking in, and you want to remove every last trace of debris suspended in the old oil. Fit a new oil filter, and this time use the type of oil you’re going to use long-term in the engine, whether that be fully synthetic, semi-synthetic or conventional oil.


